什么是 HoloInsight
HoloInsight 关联项目:
- HoloInsight
- HoloInsight Agent
- HoloInsight Collector
- HoloInsight AI
- HoloInsight Helm Charts
- HoloInsight Docs
介绍
这份文档介绍如何快速部署一个服务端示例,并且用浏览器来访问它。
使用 docker-compose 部署
先决条件:
- 已安装 docker & docker-compose(>=v1.29 || >=v2)
- 有 Linux 或 Mac 环境
检查 docker compose 的版本:
# V1
docker-compose version

# V2
docker compose version
可以参考附录里的 安装-docker-compose.
- 克隆仓库
git clone https://github.com/traas-stack/holoinsight.git --depth 1
- 运行部署脚本
sh ./deploy/examples/docker-compose/up.sh
这个脚本会同时部署一个 holoinsight-agent 到 holoinsight-server 容器中,这种用法仅仅用于演示,不适用于生产环境。
- 访问 Holoinsight
访问 http://localhost:8080
产品的使用方法可以参考这个文档。
使用 K8s 部署
现在更推荐参考这个文档基于 K8s 部署
先决条件:
-
有 K8s 集群
-
有 Linux 或 Mac 环境
-
克隆仓库
git clone https://github.com/traas-stack/holoinsight.git --depth 1
- 部署 K8s 资源
sh ./deploy/examples/k8s/overlays/example/apply.sh
Notice: 你的 K8s 用户必须有权限创建 ClusterRole。
使用如下脚本将 Holoinsight 从 K8s 集群中卸载。
# sh ./deploy/examples/k8s/overlays/example/delete.sh
- 访问 Holoinsight
访问 http://localhost:8080
产品的使用方法可以参考这个文档。
附录
安装 docker-compose
快速安装 docker-compose V1.29.2:
sudo curl -SL https://github.com/docker/compose/releases/download/1.29.2/docker-compose-Linux-x86_64 -o /usr/local/bin/docker-compose && sudo chmod a+x /usr/local/bin/docker-compose
集成
这是使用集成的指南,包含集成组件库和监控市场,具体使用方式请参考详细介绍文档
集成组件库
JVM 性能监控
打开页面 http://localhost:8080/integration/agentComp?tenant=default.
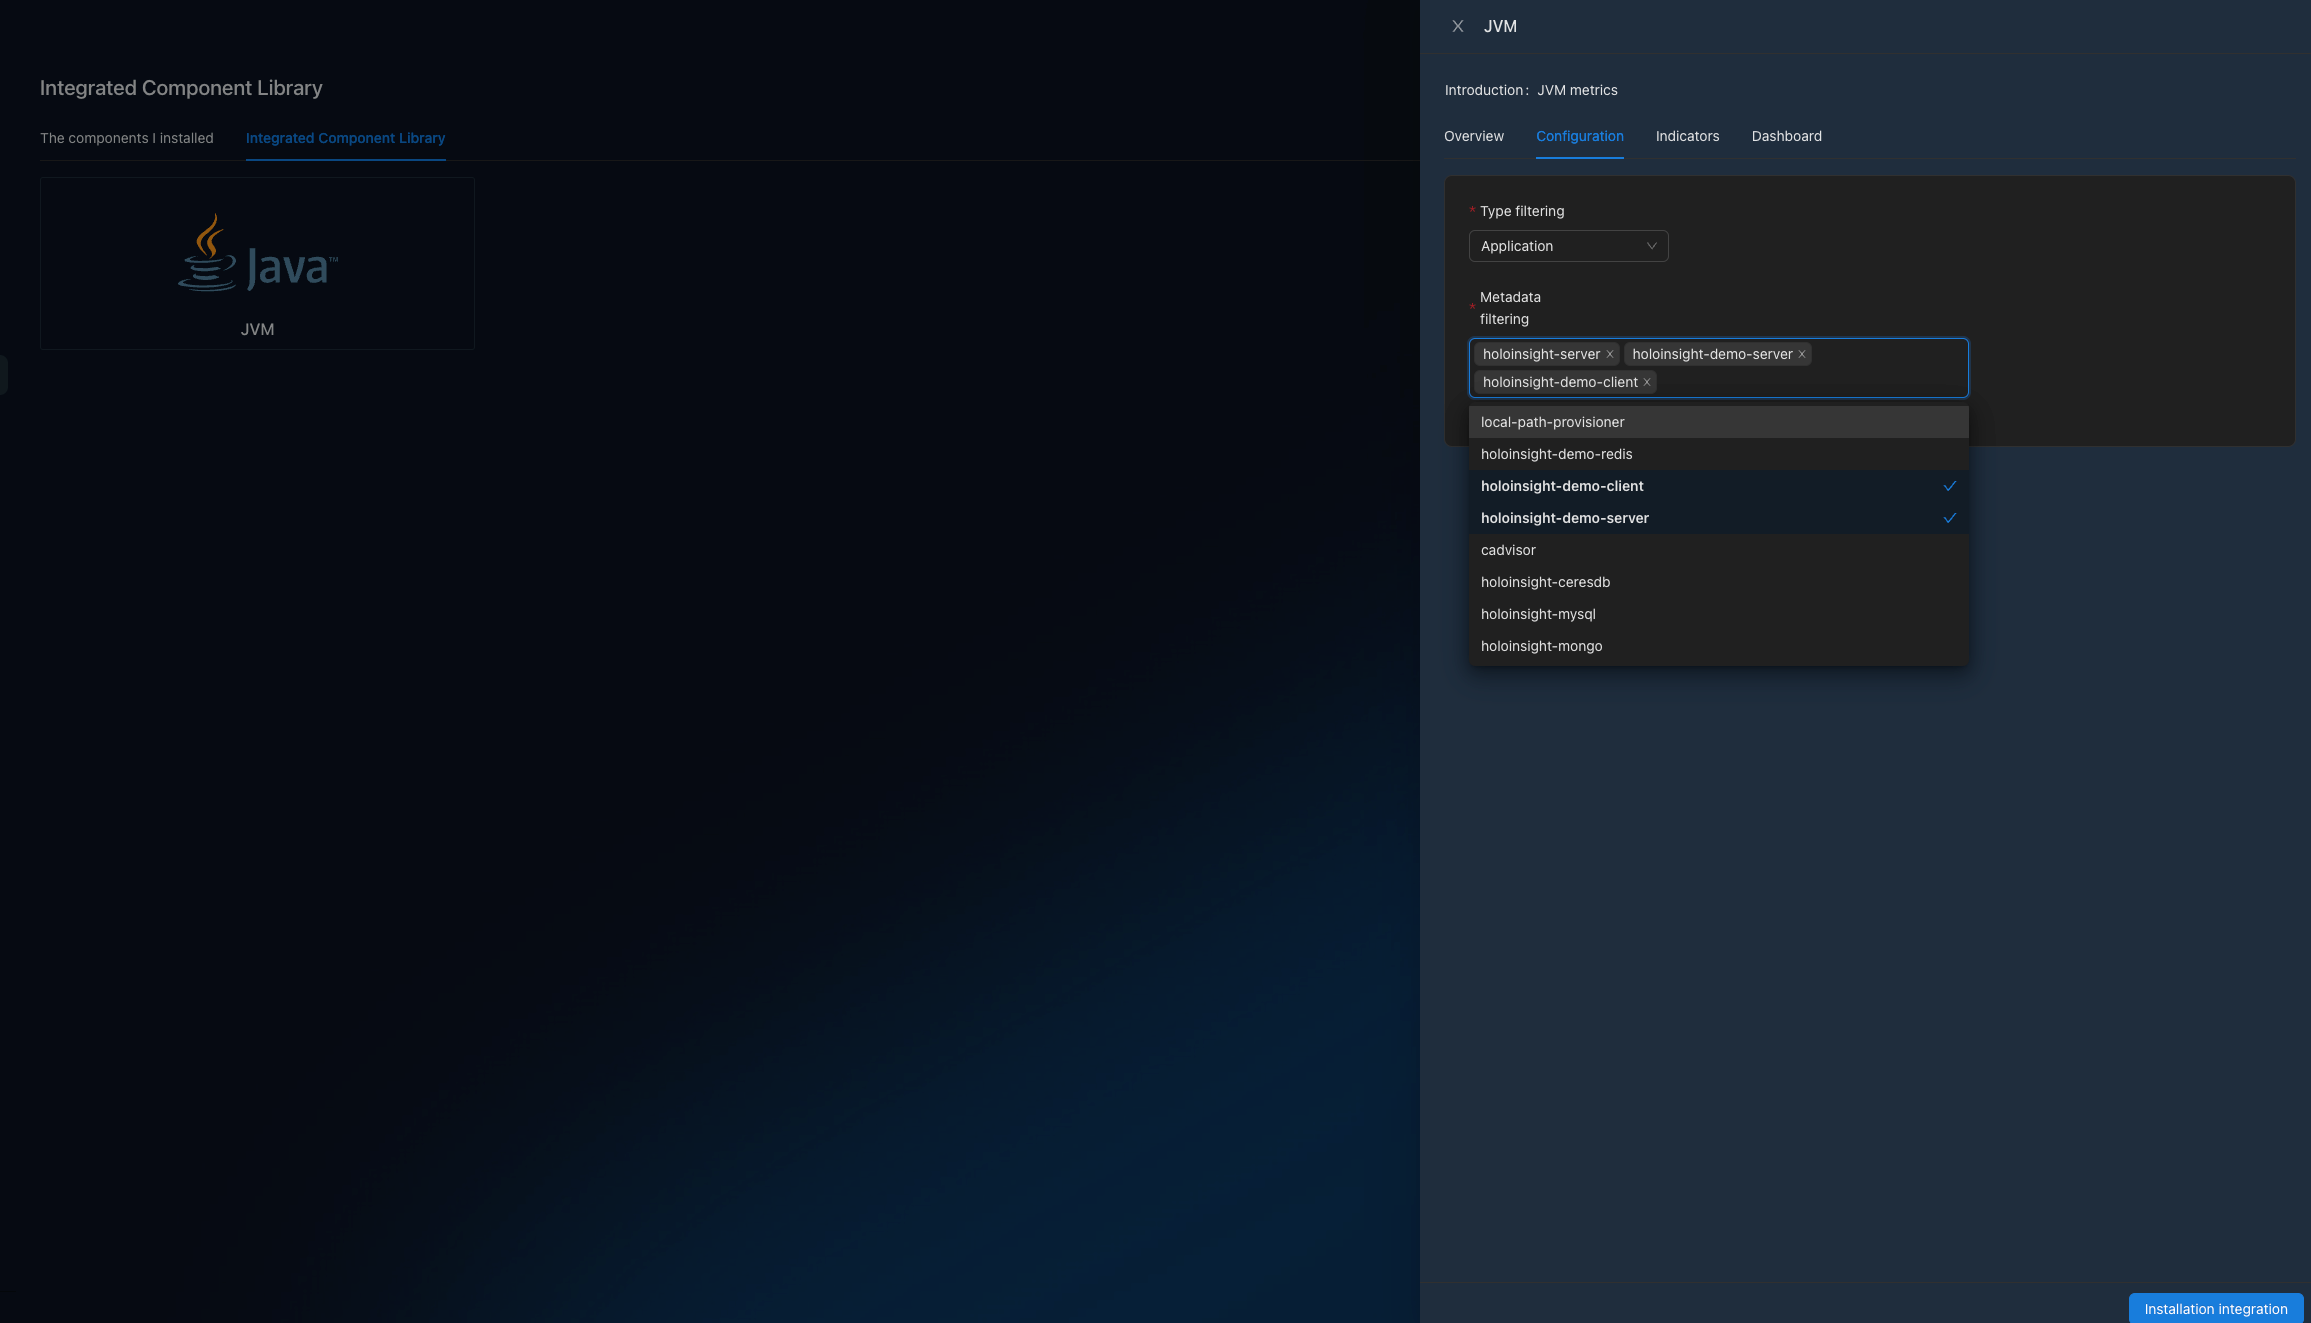
安装 JVM 集成组件,在本例子里配置应用名单为 [holoinsight-server, holoinsight-demo-server, holoinsight-demo-client].
等待几分钟.
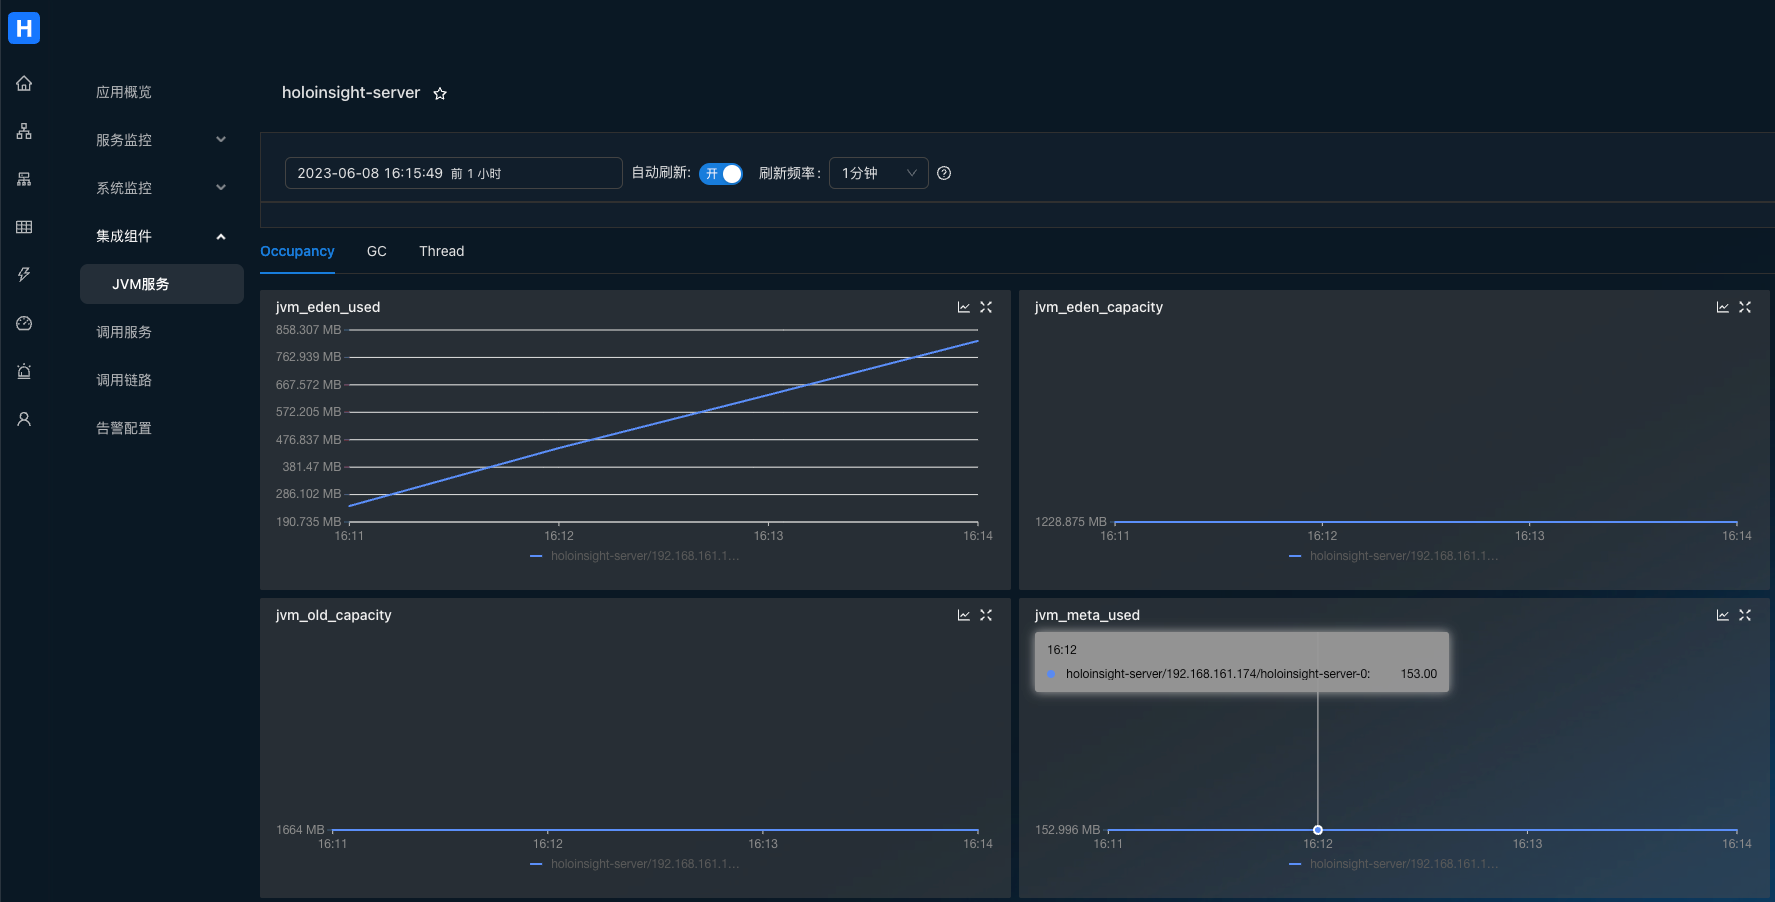
打开页面 http://localhost:8080/app/dashboard/jvm?app=holoinsight-server&id=6&tenant=default
OpenAIMonitor 插件
在您服务的环境中配置环境变量
export DD_SERVICE="your_app_name"
在调用OpenAI代码中引入 ddtrace 包
pip install ddtrace>=1.13
下面是代码示例,你可以直接运行来测试
import openai
from flask import Flask
from ddtrace import tracer, patch

app = Flask(__name__)
tag = {
    'env': 'test',
    'tenant': 'default', # 配置租户信息
    'version': 'v0.1'
}
# 配置Collector_DataDog地址及端口
tracer.configure(
    hostname='localhost',
    port='5001'
)
tracer.set_tags(tag)
patch(openai=True)

@app.route('/test/openai')
def hello_world():
    openai.api_key = 'sk-***********' # 填写openai的api_key
    openai.proxy = '*******'          # 按需配置代理地址
    return ChatCompletion('gpt-3.5-turbo')


def ChatCompletion(model):
    content = 'Hello World!'
    messages = [{'role': 'user', 'content': content}]
    result = openai.ChatCompletion.create(api_key=openai.api_key, model=model, messages=messages)
    print('prompt_tokens: {}, completion_tokens: {}'.format(result['usage']['prompt_tokens'],
                                                         result['usage']['completion_tokens']))
    return result

def Completion(engine):
    content = 'Hello World!'
    result = openai.Completion.create(engine=engine, prompt=content, max_tokens=50)
    print('prompt_tokens: {}, completion_tokens: {}'.format(result['usage']['prompt_tokens'],
                                                            result['usage']['completion_tokens']))
    return result


if __name__ == '__main__':
    app.run(port=5002)
调用接口
curl --location --request GET 'localhost:5002/test/openai'
打开页面 http://localhost:8080/integration/agentComp?tenant=default.
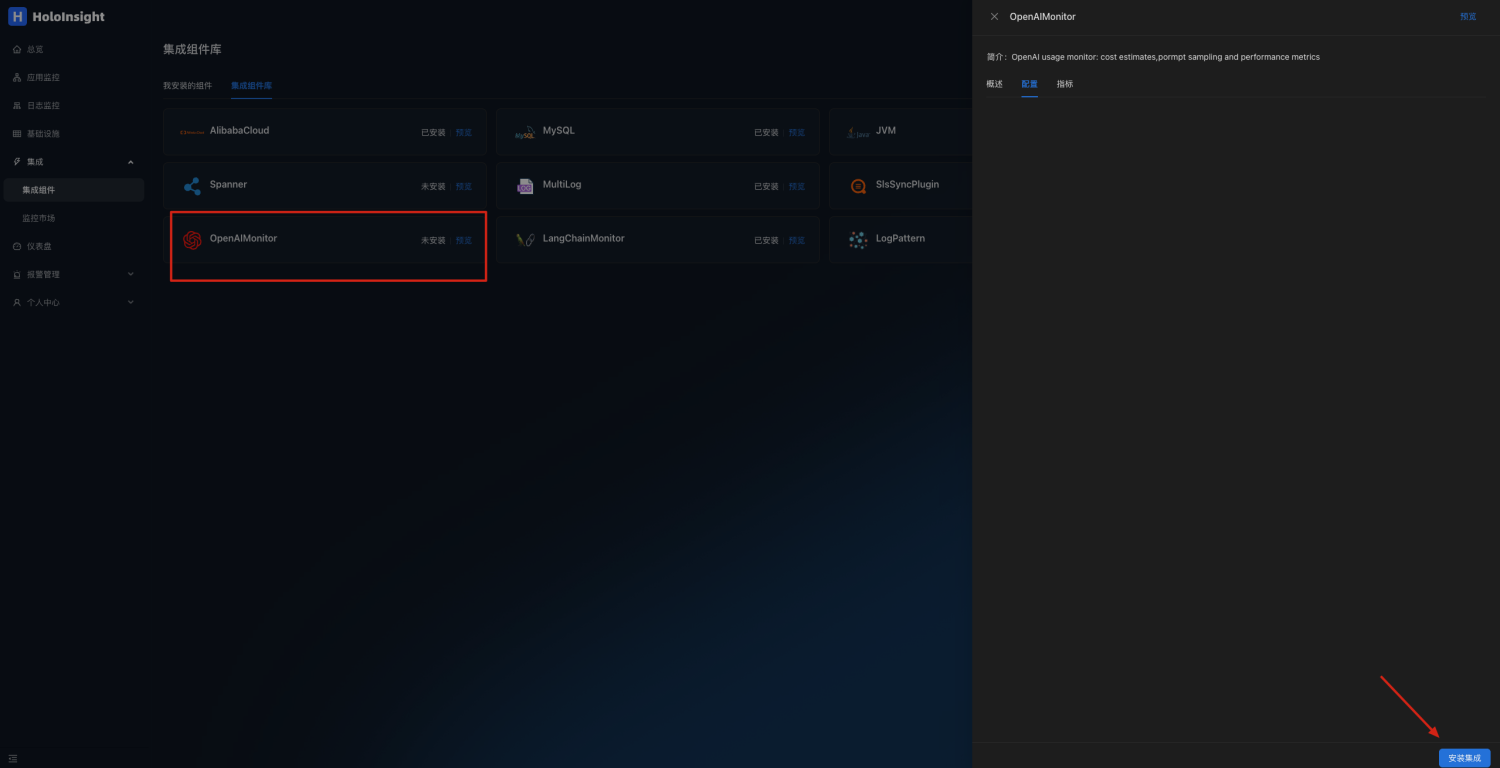
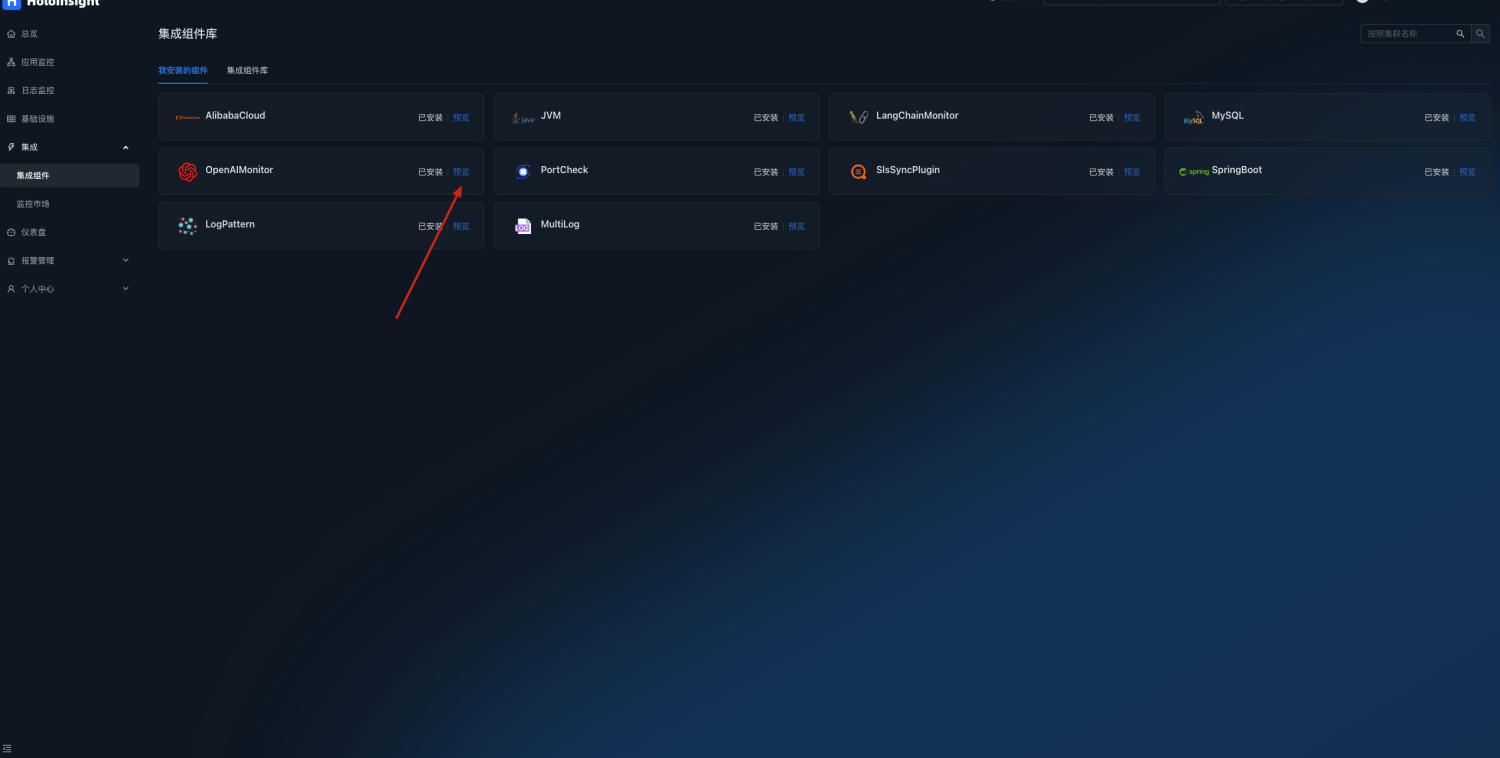
在集成组件页面安装OpenAIMonitor插件
 点击预览
点击预览
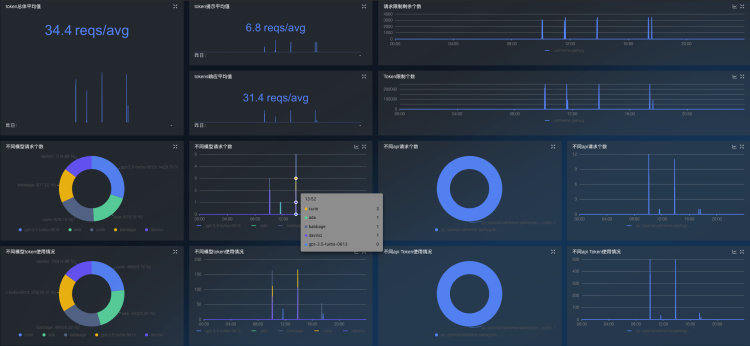
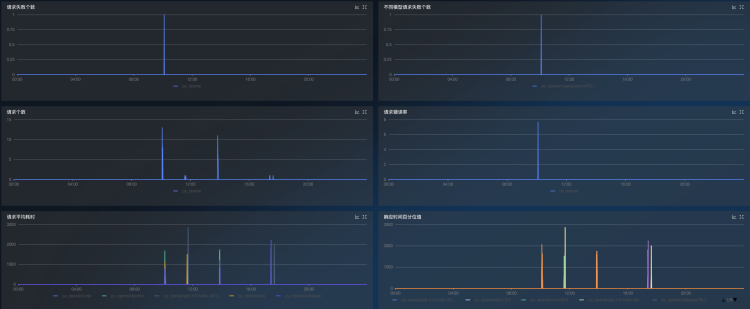
可以自动生成OpenAI监控仪表盘,监控token使用情况及接口请求情况
LangChainMonitor 插件
在您服务的环境中配置环境变量
export DD_SERVICE="your_app_name"
在调用langchain代码中引入 ddtrace 包
pip install ddtrace>=1.17
下面是代码示例,你可以直接运行来测试
import os
from langchain import OpenAI
from langchain.chat_models import ChatOpenAI
from flask import Flask
from ddtrace import tracer, patch

app = Flask(__name__)
tag = {
    'env': 'test',
    'tenant': 'default', # 配置租户信息
    'version': 'v0.1'
}
# 配置Collector_DataDog地址及端口
tracer.configure(
    hostname="localhost",
    port="5001"
)
tracer.set_tags(tag)
patch(langchain=True)

os.environ["OPENAI_API_KEY"] = "sk-***********" # 填写openai的api_key
os.environ["OPENAI_PROXY"] = "******"           # 按需配置代理地址

@app.route('/test/langchain')
def hello_world():
    return ChatFuc('gpt-3.5-turbo')

def OpenAIFuc(model):
    random_string = 'Hello World!'
    chat = OpenAI(temperature=0, model_name=model, max_tokens=50)
    return chat.predict(random_string)

def ChatFuc(model):
    random_string = 'Hello World!'
    chat = ChatOpenAI(temperature=0, model_name=model)
    return chat.predict(random_string)


if __name__ == '__main__':
    app.run(port=5003)
调用接口
curl --location --request GET 'localhost:5003/test/langchain'
打开页面 http://localhost:8080/integration/agentComp?tenant=default.
在集成组件页面安装LangChainMonitor插件
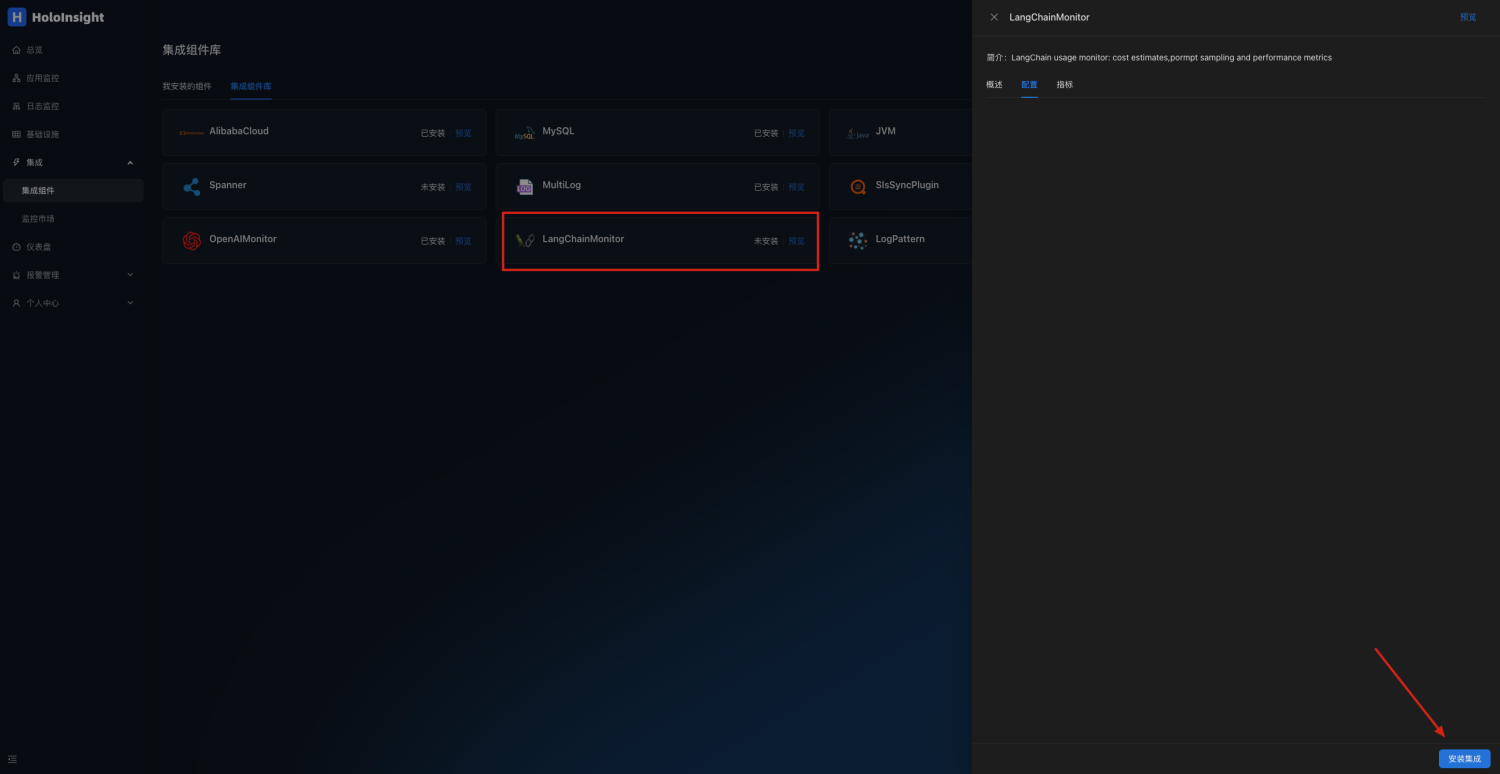 点击预览
点击预览
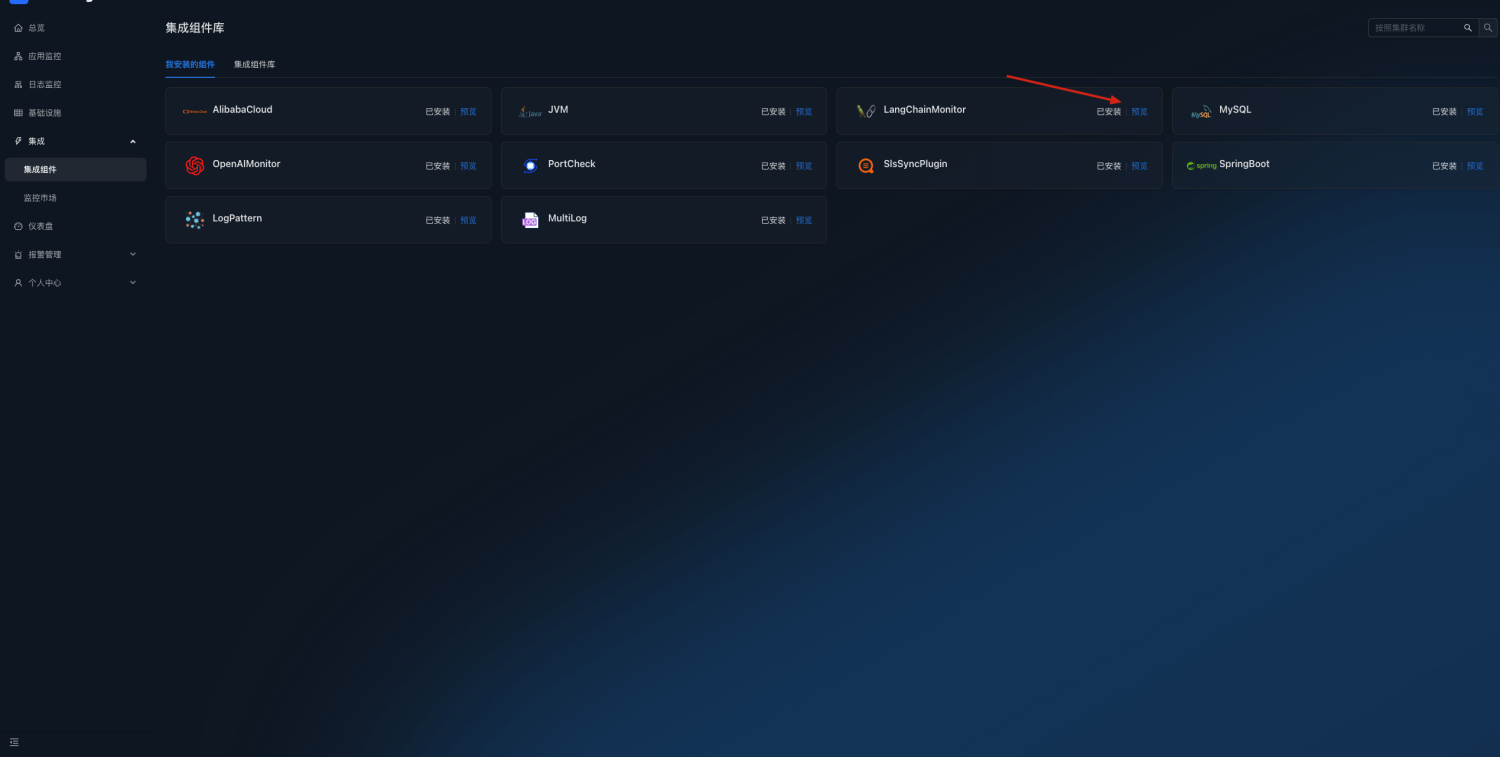
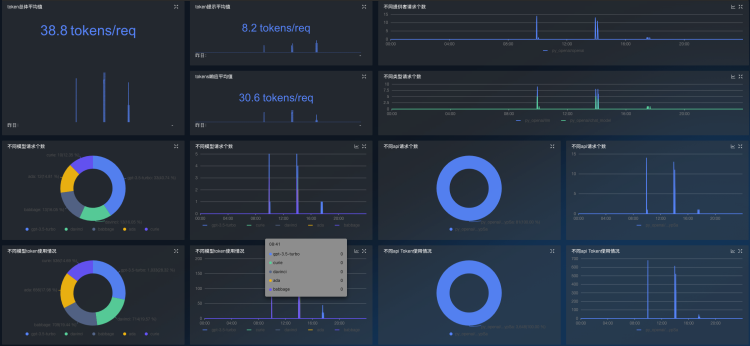
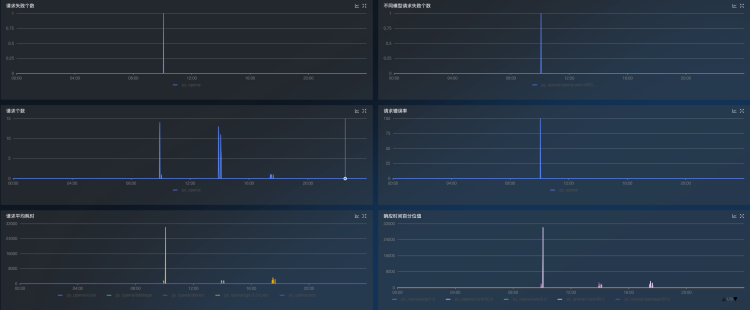
可以自动生成LangChain监控仪表盘,监控token使用情况及接口请求情况
dcgmMonitor 插件
在您GPU机器上部署k8s环境,并且安装dcgm-exporter和Holoinsight-agent,具体安装方法见文档
安装好之后默认会采集GPU数据 打开页面 http://localhost:8080/integration/agentComp?tenant=default.
在集成组件页面安装DCGMMonitor插件
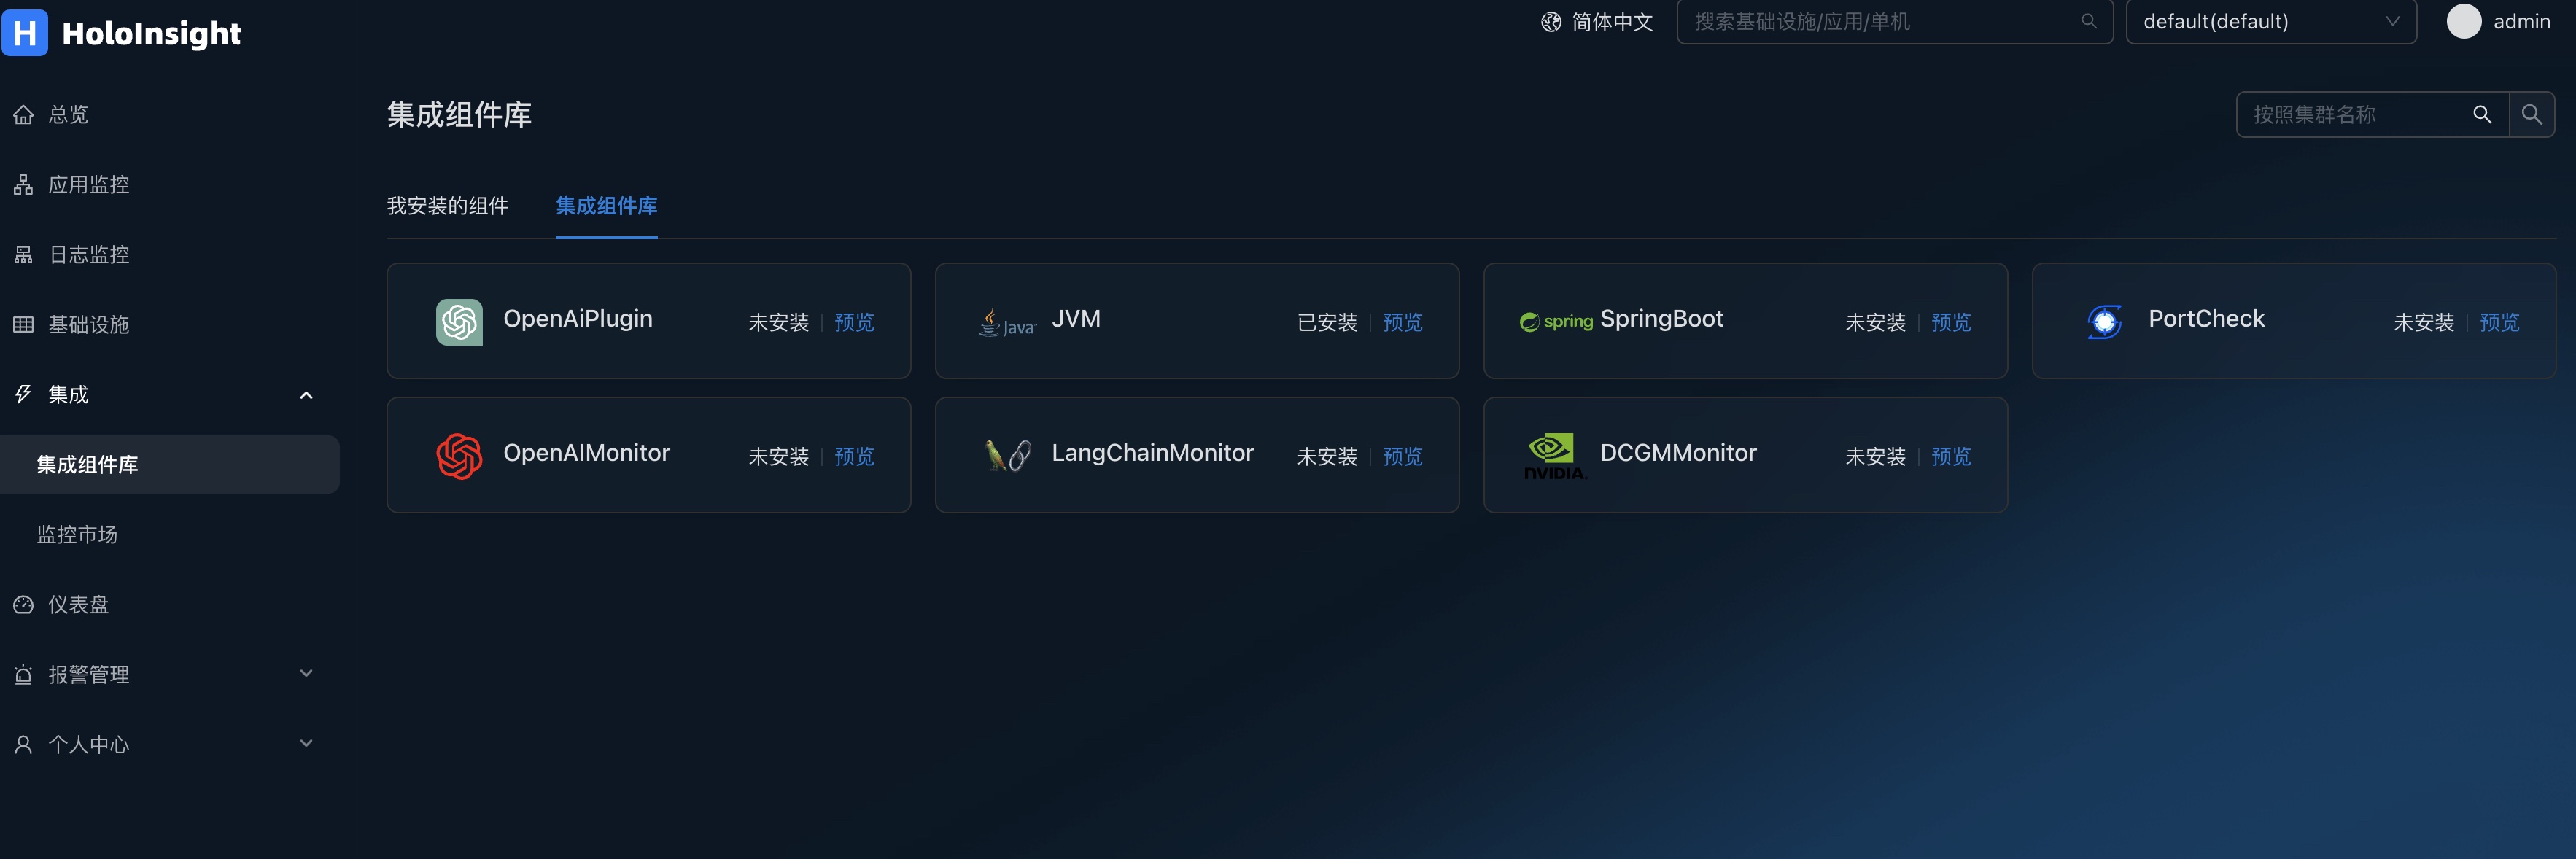 点击预览
点击预览
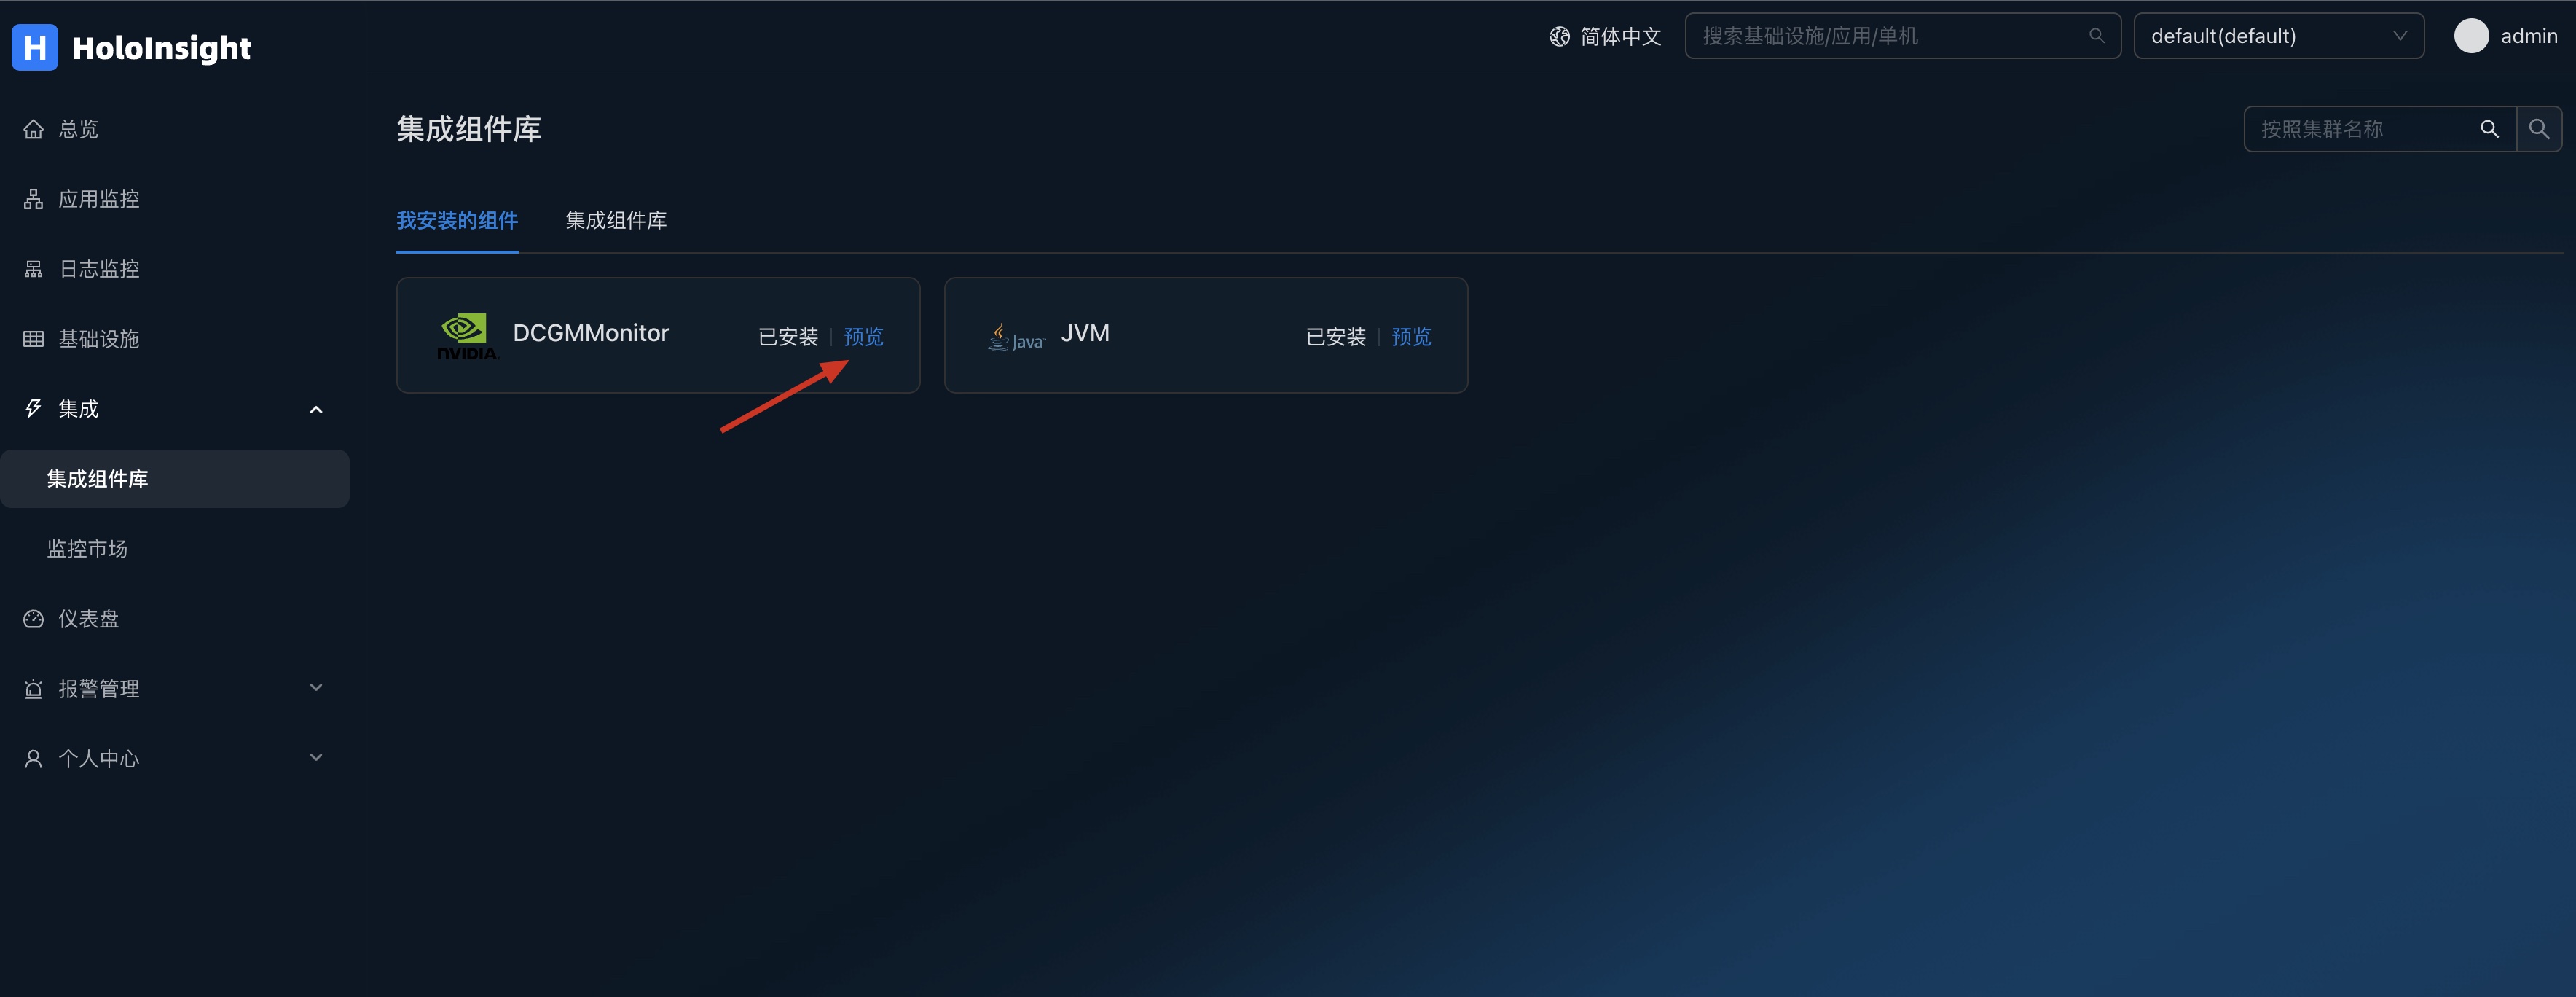
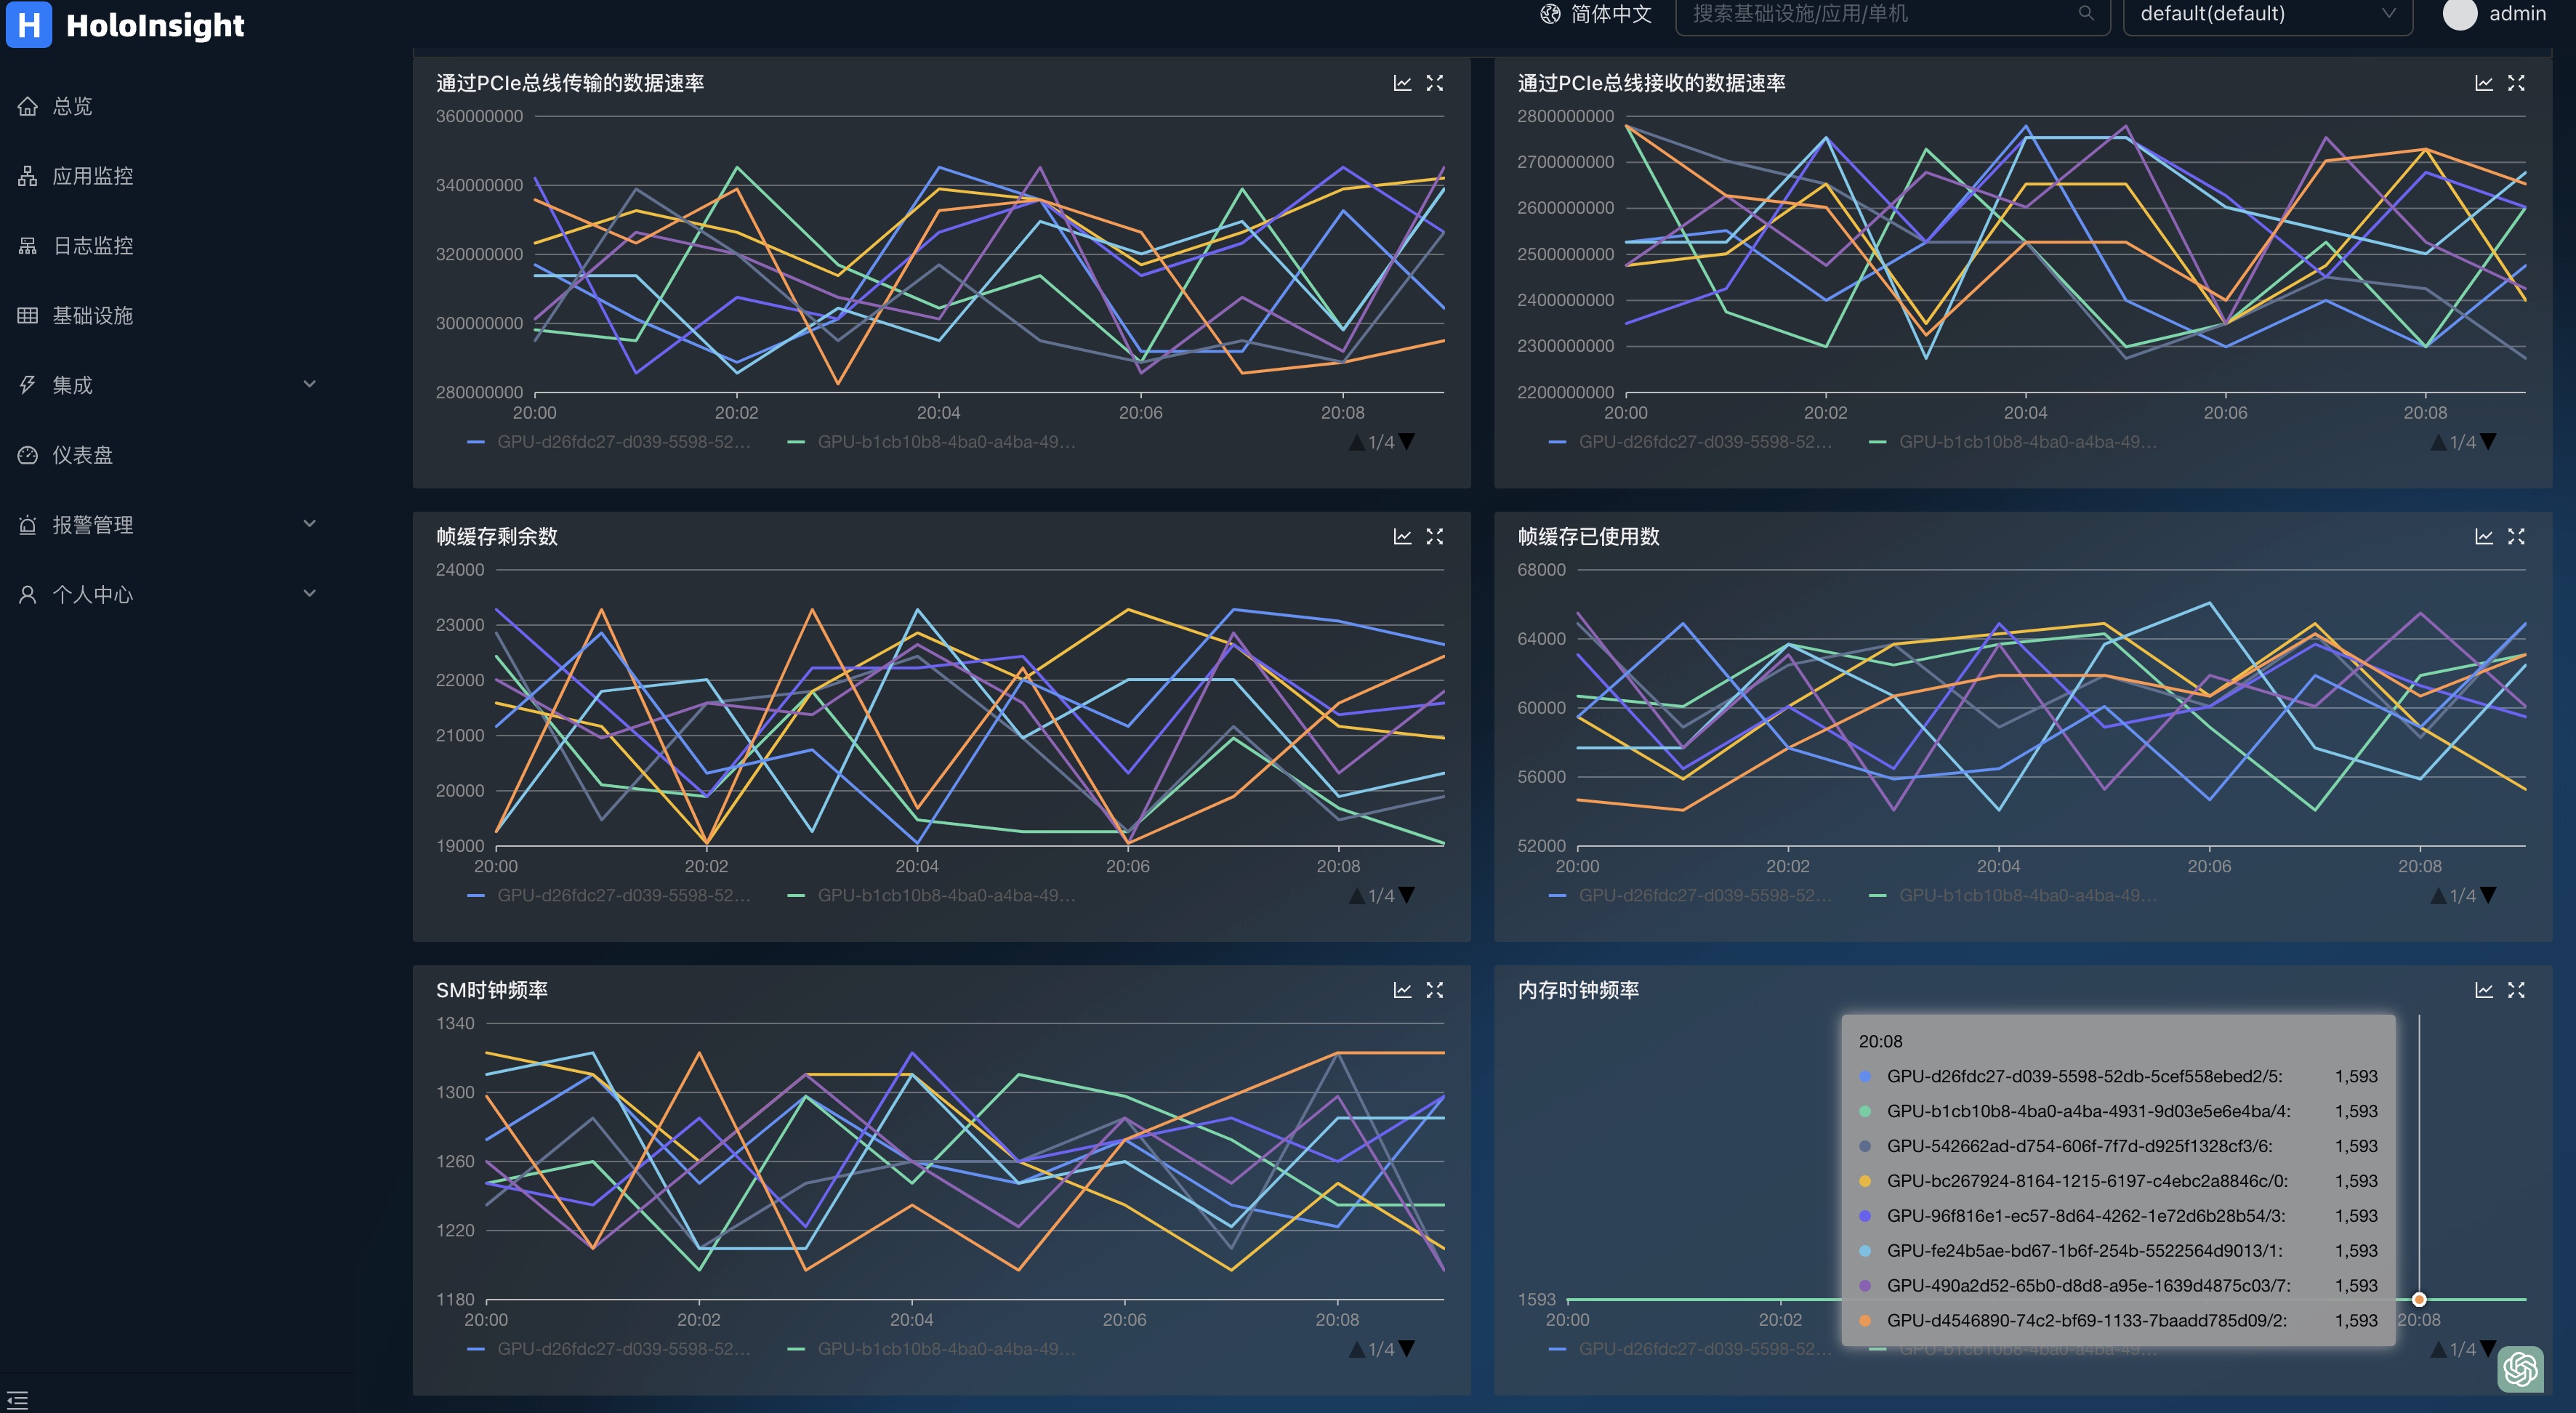
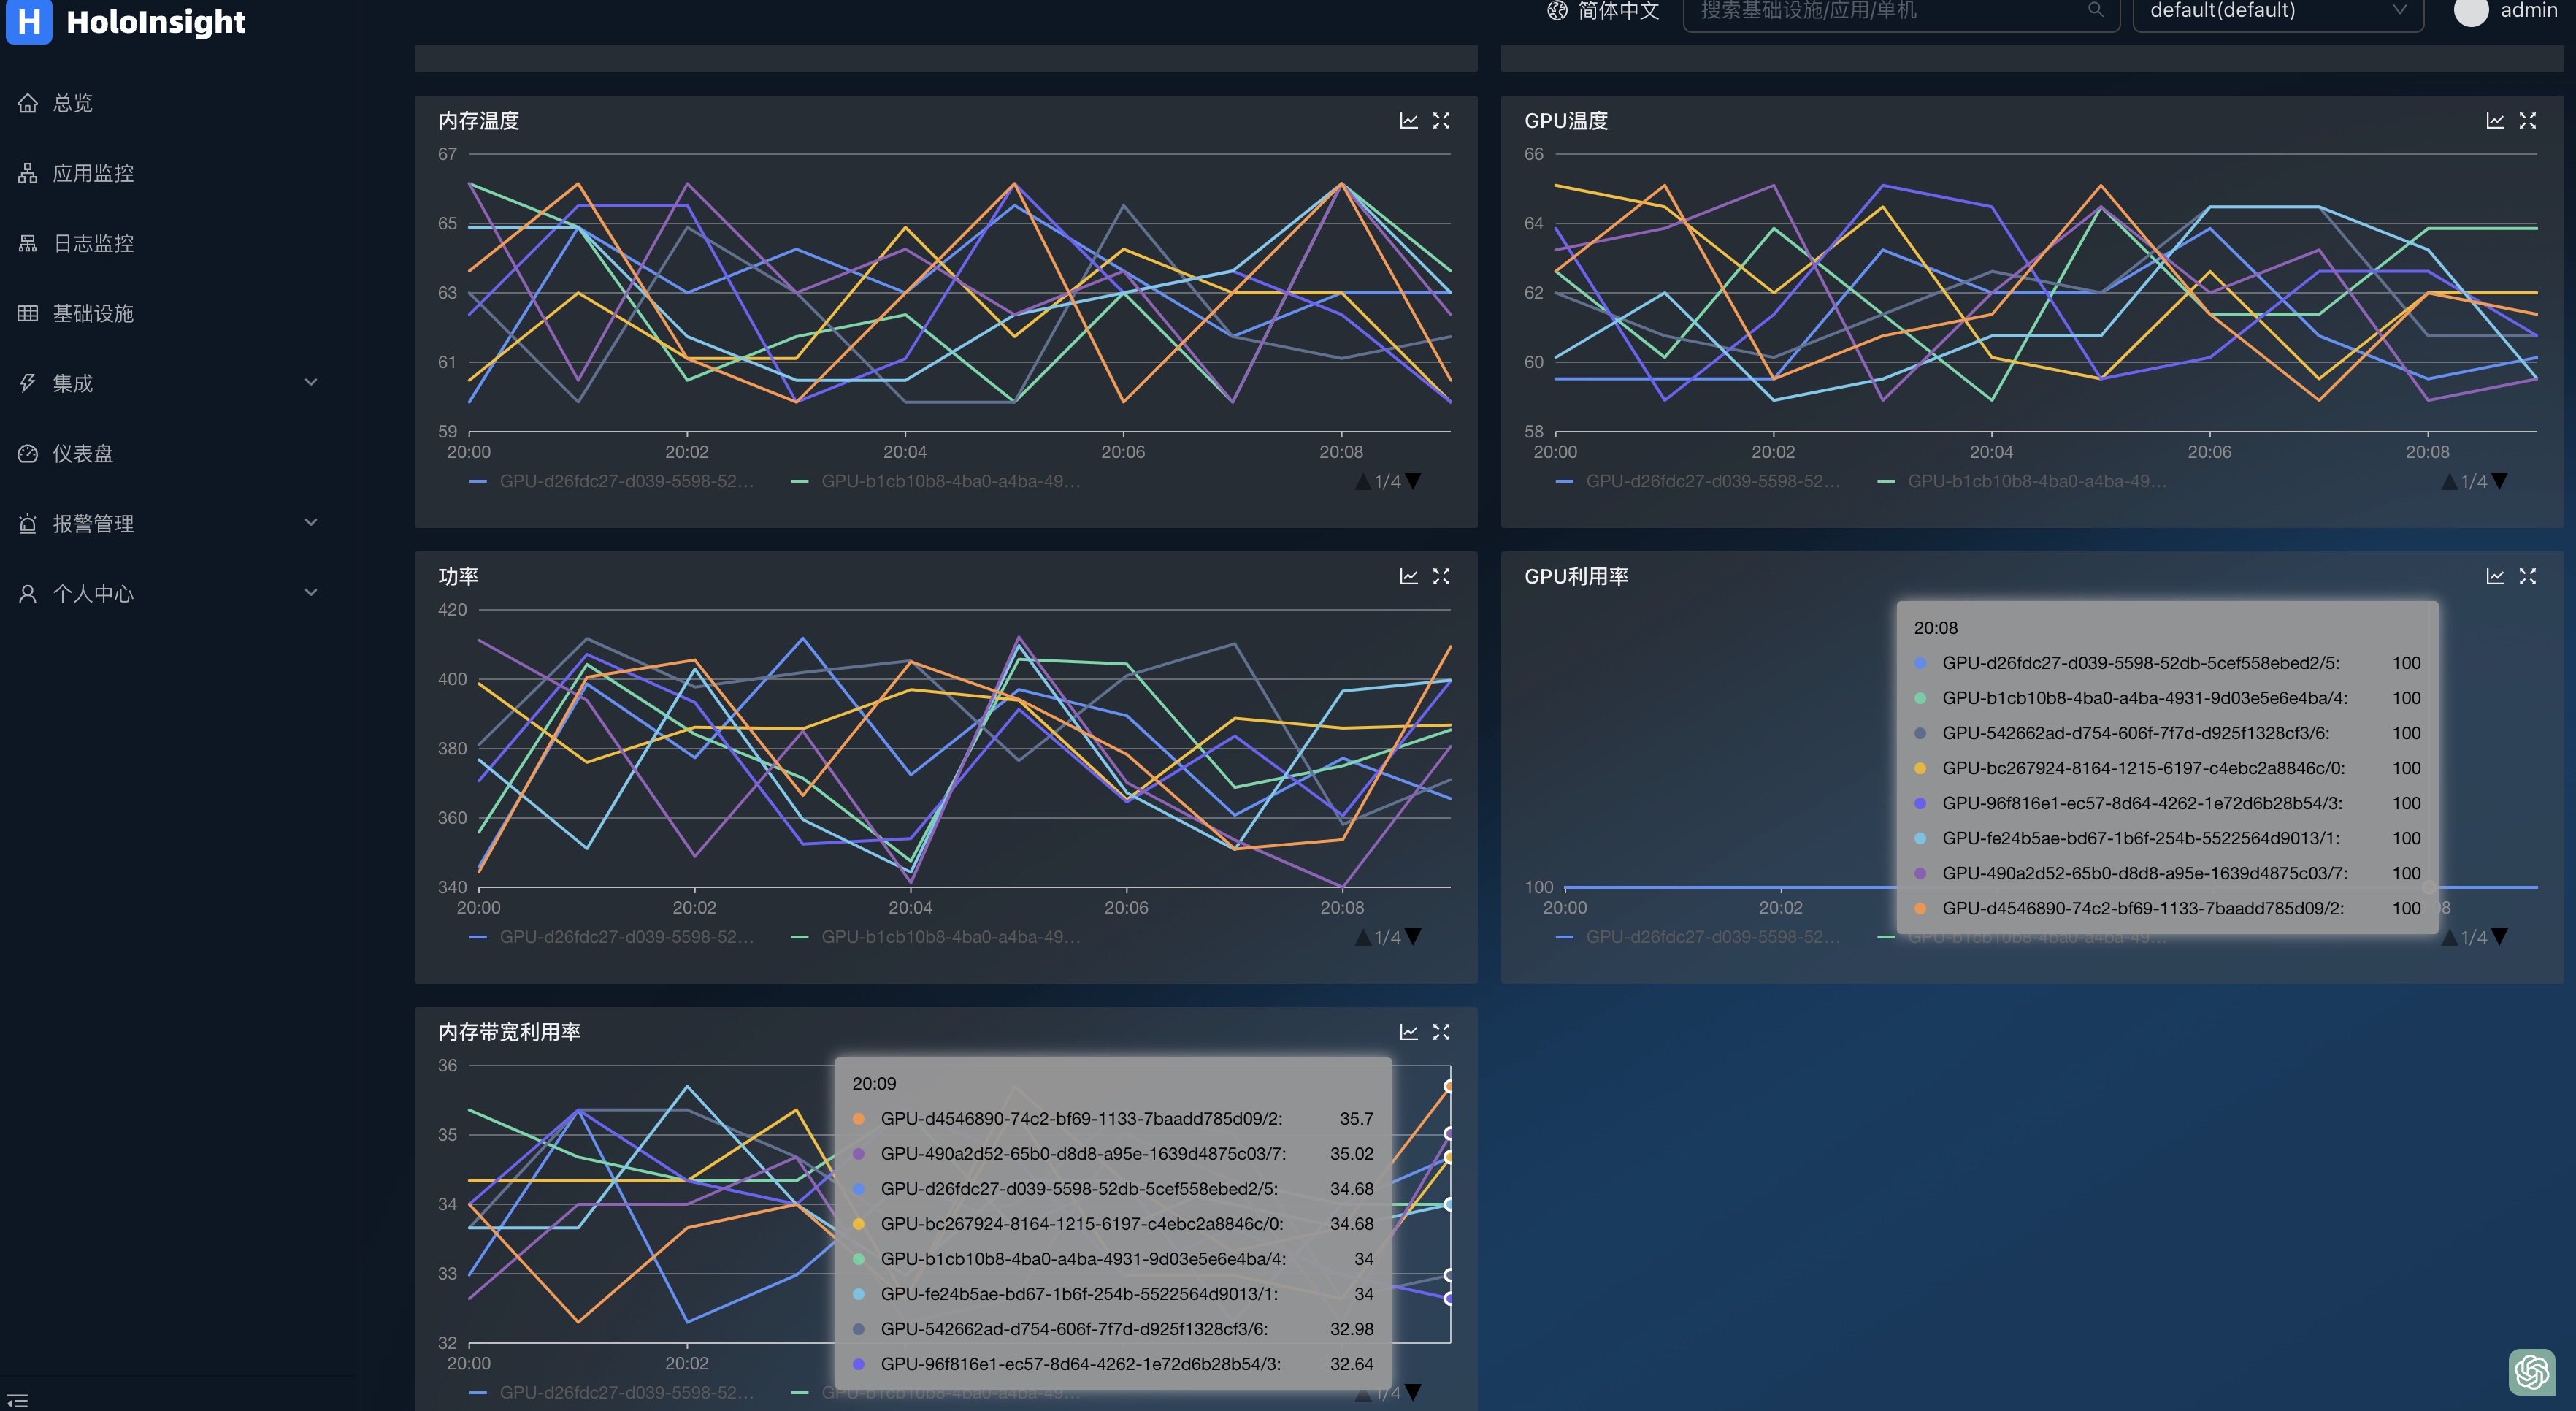
可以自动生成dcgm监控仪表盘,监控GPU信息
编译 Server
Compile 要求:
- JDK 8
- Maven
sh ./scripts/all-in-one/build.sh
编译结果:
- server/all-in-one/target/holoinsight-server.jar : 一个 Spring Boot 的 fat jar
编译 Agent
编译要求:
- Golang 1.19 or docker
使用 Go 编译 agent:
./scripts/build/build-using-go.sh
使用 Docker 编译 agent:
./scripts/build/build-using-docker.sh
编译结果:
- build/linux-amd64/bin/agent
- build/linux-amd64/bin/helper
构建 server docker 镜像
构建多架构 docker 镜像
sh ./scripts/docker/buildx.sh
构建结果:
- holoinsight/server:temp-amd64-linux
- holoinsight/server:temp-arm64v8-linux
样例输出:
use /root/.docker/cli-plugins/buildx
[+] Building 6.1s (32/32) FINISHED
=> [internal] load build definition from Dockerfile 0.0s
=> => transferring dockerfile: 2.54kB 0.0s
=> [internal] load .dockerignore 0.0s
=> => transferring context: 2B 0.0s
=> [internal] load metadata for docker.io/library/centos:7 1.8s
=> [internal] load metadata for docker.io/azul/zulu-openjdk:8 0.0s
=> [auth] library/centos:pull token for registry-1.docker.io 0.0s
=> [internal] load build context 0.8s
=> => transferring context: 127.70MB 0.8s
=> [stage-1 1/24] FROM docker.io/library/centos:7@sha256:be65f488b7764ad3638f236b7b515b3678369a5124c47b8d32916d6487418ea4 0.0s
=> [jdk 1/1] FROM docker.io/azul/zulu-openjdk:8 0.0s
=> CACHED [stage-1 2/24] COPY --from=jdk /usr/lib/jvm/zulu8 /opt/java8 0.0s
=> CACHED [stage-1 3/24] RUN groupadd --gid 500 admin && useradd admin -s /bin/bash --uid 500 --gid 500 -G root 0.0s
=> CACHED [stage-1 4/24] RUN ln -s /opt/java8 /usr/local/java 0.0s
=> CACHED [stage-1 5/24] RUN ln -snf /usr/share/zoneinfo/Asia/Shanghai /etc/localtime && yum -y -q install epel-release && yum install -y -q sudo net-tools iproute dstat which supervisor stress unzip jq screen nginx wget telnet cronolog less lsof gettext && 0.0s
=> CACHED [stage-1 6/24] RUN wget -qO /opt/arthas.zip https://arthas.aliyun.com/download/latest_version?mirror=aliyun && unzip -d /opt/arthas /opt/arthas.zip >/dev/null && rm /opt/arthas.zip 0.0s
=> CACHED [stage-1 7/24] COPY scripts/docker/sc /usr/local/bin/ 0.0s
=> CACHED [stage-1 8/24] COPY scripts/docker/ensure_supervisord.sh /usr/local/bin/ 0.0s
=> CACHED [stage-1 9/24] COPY scripts/docker/supervisord.conf /etc/supervisord.conf 0.0s
=> CACHED [stage-1 10/24] RUN echo 'export LANG=zh_CN.UTF-8' >> /etc/profile && echo 'LC_ALL=zh_CN.UTF-8' >> /etc/profile && echo 'PS1="\n\e[1;37m[\e[m\e[1;32m\u\e[m\e[1;33m@\e[m\e[1;35m\h\e[m \e[1;35m`hostname`\e[m \e[4m\`pwd\`\e[m\e[1;37m]\e[m\e[1;36m\e[m\ 0.0s
=> CACHED [stage-1 11/24] COPY scripts/docker/bin/app.ini /etc/supervisord.d/app.ini 0.0s
=> CACHED [stage-1 12/24] RUN true 0.0s
=> CACHED [stage-1 13/24] COPY --chown=admin:admin scripts/docker/bin/*.sh /home/admin/bin/ 0.0s
=> CACHED [stage-1 14/24] RUN true 0.0s
=> CACHED [stage-1 15/24] COPY scripts/docker/entrypoint.sh /entrypoint.sh 0.0s
=> CACHED [stage-1 16/24] RUN true 0.0s
=> CACHED [stage-1 17/24] RUN chown -R admin:admin /home/admin 0.0s
=> CACHED [stage-1 18/24] WORKDIR /home/admin 0.0s
=> CACHED [stage-1 19/24] COPY scripts/api /home/admin/api 0.0s
=> CACHED [stage-1 20/24] COPY scripts/docker/nginx.conf /etc/nginx/nginx.conf 0.0s
=> CACHED [stage-1 21/24] COPY scripts/docker/dist.zip /home/admin/dist.zip 0.0s
=> CACHED [stage-1 22/24] RUN unzip -d /home/admin/holoinsight-server-static/ /home/admin/dist.zip 0.0s
=> [stage-1 23/24] COPY --chown=admin:admin server/all-in-one/all-in-one-bootstrap/target/holoinsight-server.jar /home/admin/app.jar 1.9s
=> [stage-1 24/24] RUN echo `date` > /home/admin/build-time 0.2s
=> exporting to image 1.3s
=> => exporting layers 1.3s
=> => writing image sha256:c530e069bede114129eec4df3a55452bc37815967071c9e0f2fe04e871a2329e 0.0s
=> => naming to docker.io/holoinsight/server:temp-amd64-linux 0.0s
use /root/.docker/cli-plugins/buildx
[+] Building 4.5s (32/32) FINISHED
=> [internal] load build definition from Dockerfile 0.0s
=> => transferring dockerfile: 32B 0.0s
=> [internal] load .dockerignore 0.0s
=> => transferring context: 2B 0.0s
=> [internal] load metadata for docker.io/azul/zulu-openjdk:8 1.7s
=> [internal] load metadata for docker.io/library/centos:7 0.0s
=> [auth] azul/zulu-openjdk:pull token for registry-1.docker.io 0.0s
=> [internal] load build context 0.0s
=> => transferring context: 2.84kB 0.0s
=> [stage-1 1/24] FROM docker.io/library/centos:7 0.0s
=> [jdk 1/1] FROM docker.io/azul/zulu-openjdk:8@sha256:c732e7f24fceef589c740a2b410e478100473b969461a89dd7c655e73d38b614 0.0s
=> CACHED [stage-1 2/24] COPY --from=jdk /usr/lib/jvm/zulu8 /opt/java8 0.0s
=> CACHED [stage-1 3/24] RUN groupadd --gid 500 admin && useradd admin -s /bin/bash --uid 500 --gid 500 -G root 0.0s
=> CACHED [stage-1 4/24] RUN ln -s /opt/java8 /usr/local/java 0.0s
=> CACHED [stage-1 5/24] RUN ln -snf /usr/share/zoneinfo/Asia/Shanghai /etc/localtime && yum -y -q install epel-release && yum install -y -q sudo net-tools iproute dstat which supervisor stress unzip jq screen nginx wget telnet cronolog less lsof gettext && 0.0s
=> CACHED [stage-1 6/24] RUN wget -qO /opt/arthas.zip https://arthas.aliyun.com/download/latest_version?mirror=aliyun && unzip -d /opt/arthas /opt/arthas.zip >/dev/null && rm /opt/arthas.zip 0.0s
=> CACHED [stage-1 7/24] COPY scripts/docker/sc /usr/local/bin/ 0.0s
=> CACHED [stage-1 8/24] COPY scripts/docker/ensure_supervisord.sh /usr/local/bin/ 0.0s
=> CACHED [stage-1 9/24] COPY scripts/docker/supervisord.conf /etc/supervisord.conf 0.0s
=> CACHED [stage-1 10/24] RUN echo 'export LANG=zh_CN.UTF-8' >> /etc/profile && echo 'LC_ALL=zh_CN.UTF-8' >> /etc/profile && echo 'PS1="\n\e[1;37m[\e[m\e[1;32m\u\e[m\e[1;33m@\e[m\e[1;35m\h\e[m \e[1;35m`hostname`\e[m \e[4m\`pwd\`\e[m\e[1;37m]\e[m\e[1;36m\e[m\ 0.0s
=> CACHED [stage-1 11/24] COPY scripts/docker/bin/app.ini /etc/supervisord.d/app.ini 0.0s
=> CACHED [stage-1 12/24] RUN true 0.0s
=> CACHED [stage-1 13/24] COPY --chown=admin:admin scripts/docker/bin/*.sh /home/admin/bin/ 0.0s
=> CACHED [stage-1 14/24] RUN true 0.0s
=> CACHED [stage-1 15/24] COPY scripts/docker/entrypoint.sh /entrypoint.sh 0.0s
=> CACHED [stage-1 16/24] RUN true 0.0s
=> CACHED [stage-1 17/24] RUN chown -R admin:admin /home/admin 0.0s
=> CACHED [stage-1 18/24] WORKDIR /home/admin 0.0s
=> CACHED [stage-1 19/24] COPY scripts/api /home/admin/api 0.0s
=> CACHED [stage-1 20/24] COPY scripts/docker/nginx.conf /etc/nginx/nginx.conf 0.0s
=> CACHED [stage-1 21/24] COPY scripts/docker/dist.zip /home/admin/dist.zip 0.0s
=> CACHED [stage-1 22/24] RUN unzip -d /home/admin/holoinsight-server-static/ /home/admin/dist.zip 0.0s
=> [stage-1 23/24] COPY --chown=admin:admin server/all-in-one/all-in-one-bootstrap/target/holoinsight-server.jar /home/admin/app.jar 0.9s
=> [stage-1 24/24] RUN echo `date` > /home/admin/build-time 0.4s
=> exporting to image 1.4s
=> => exporting layers 1.4s
=> => writing image sha256:6cc3d08d49f05a439d9a02ea33191da8f99562250650db009dcc0a937551f825 0.0s
=> => naming to docker.io/holoinsight/server:temp-arm64v8-linux 0.0s
构建 agent docker 镜像
构建要求:
- Linux 或 Mac
- Docker
- Docker buildx
构建当前架构的 agent Docker 镜像
./scripts/docker/build.sh

# 中国的用户可以使用 GOPROXY 加速构建
GOPROXY="https://goproxy.cn,direct" ./scripts/docker/build.sh
构建结果:
- holoinsight/agent:latest (contains only current arch)
构建结果会导入到本地的 Docker。
构建多架构的 agent Docker 镜像
./scripts/docker/buildx.sh

# 中国的用户可以使用 GOPROXY 加速构建
GOPROXY="https://goproxy.cn,direct" ./scripts/docker/buildx.sh
构建结果:
- holoinsight/agent:latest (contains linux/amd64 and linux/arm64/v8 platforms)
构建结果会上传到 Docker Hub。
时间解析
介绍 时间戳的解析有如下步骤:
- 提取时间字符串,需要用到 elect 来提取时间字符串
- 确定时区,如果容器的时区为空, 那么使用该时区
- 尝试将时间字符串解析为毫秒时间戳,该步骤需要了解时间字符串的格式和布局
时间戳的提取配置由如下结构体定义:
TimeConf struct {
   Type  string `json:"type"`
   Elect *Elect `json:"elect"`
   Format string `json:"format"`
   Layout string `json:"layout"`
   Timezone string `json:"timezone"`
}
type 定义了总体的解析类型:
auto:全自动解析,如果选择 auto 模式,那么尝试自动从日志行里提取时间,它只适用于时间戳位于行首的简单日志,此时其他所有字段都不用配置processTime:以读到日志的时间作为时间戳,具有较大的不确定性, 此时其他所有字段都不用配置elect:从日志行里提取时间戳字符串, 然后解析成 毫秒级时间戳, 此时需要用到 elect、format、layout、timezone 字段
对于 type = elect 的情况
elect: 用于提取时间字符串format: 描述了 时间字符串的 风格: a.unix: 秒级时间戳 b.unixMilli: 毫秒级时间戳 c.golangLayout: 它的格式由一个 Golang 风格的字符串描述, 此时需要用到 Layout 字段 d.auto: 类似 type=auto 的场景, 它可以自动猜测时间戳的格式和布局layout: 仅当 format = golangLayout 时用到, layout 为 Golang 风格的时间格式timezone: 时区, 不建议填写; 建议日志和容器的时区保持一致; 如果容器时区解析非空, 则优先使用容器时区
例子
例子1: 适用于 单行日志 和 多行日志(堆栈) 时间戳在首行开头的
{
  "type": "auto"
}
此时使用容器的时区来解析时间字符串。
例子2: 用户的每行日志是一个json字符串,时间戳在 myTime 字段里,对于 myTime 的时间格式采用字段解析。
{
   "type": "elect",
   "elect": {
      "type": "refName",
         "refName": {
         "name": "myTime"
      }
   },
   "format": "auto"
}
此时使用容器的时区来解析时间字符串。
例子3: 用户的每行日志是一个json字符串, 时间戳在 myTime 字段里,对于 myTime 的时间格式采用 "2006-01-02 15:04:05" Golang 风格的时间格式解析。
{
   "type": "elect",
   "elect": {
      "type": "refName",
      "refName": {
         "name": "myTime"
      }
   },
   "format": "golangLayout",
   "layout": "2006-01-02 15:04:05"
}
此时使用容器的时区来解析时间字符串。
例子4: 使用处理时间作为时间戳
{
  "type": "processTime"
}
自动时间解析
上文提到,HoloInsight-Agent 可以做一些自动地时间解析,其实它是内置支持了一些常见的时间格式的解析。 以下是支持的 Golang time layout:(注意这是 Golang 格式,并不代表最终时间字符串一定严格长这个样子)
- Mon Jan _2 15:04:05 MST 2006
- Mon Jan _2 15:04:05 2006
- 2006 Jan/02 15:04:05
- 02/Jan/2006 15:04:05
- Jan 02 2006 15:04:05
- 01/02/2006 15:04:05
- 2006-01-02 15:04:05.000 Z07:00
- 2006-01-02 15:04:05.000Z07:00
- 2006-01-02 15:04:05.000
- 2006-01-02 15:04:05 Z07:00
- 2006-01-02 15:04:05Z07:00
- 2006-01-02 15:04:05
- 2006/01/02 15:04:05.000 Z07:00
- 2006/01/02 15:04:05.000Z07:00
- 2006/01/02 15:04:05.000
- 2006/01/02 15:04:05 Z07:00
- 2006/01/02 15:04:05Z07:00
- 2006/01/02 15:04:05
- 2006-01-02T15:04:05.000 Z07:00
- 2006-01-02T15:04:05.000Z07:00
- 2006-01-02T15:04:05.000
- 2006-01-02T15:04:05 Z07:00
- 2006-01-02T15:04:05Z07:00
- 2006-01-02T15:04:05
解析的时候,格式最长的优先进行匹配,后面18种格式其实是3种格式的变种。
.000可以匹配毫秒部分,比如 "2006-01-02 15:04:05,123" 或 "2006-01-02 15:04:05.123"Z07:00可以匹配时区部分,比如 "2006-01-02 15:04:05,123 Z" 或 "2006-01-02 15:04:05,123 +08:00",Z 表示 UTC 时区
时区解析
容器的日志所属的时区有3个来源,按如下优先级从高到低:
- 时间字符串里自带时区信息:比如 'Z' '+08:00'
- 容器环境变量
TZ - 解析
/etc/localtime,按照规范,它必须是一个软链接,链接到/usr/share/zoneinfo/Asia/Shanghai之类的时区文件- 在实践中,很多用户并没有让
/etc/localtime成为一个软链接,而是直接将/usr/share/zoneinfo/Asia/Shanghai复制覆盖了/etc/localtime,因此它是一个普通文件 - 在实践中,出现过
/etc/localtime指向/usr/share/zoneinfo/UTC,但UTC的文件内容竟然是东八区的内容:从文件名看起来是UTC, 但实际是CST-8(东八区),这意味着我们需要解析文件内容才能最终确定时区,但是 zoneinfo 的文件内容只会告诉你该地理时区包含哪几个经度时区,比如Asia/Shanghai文件会告诉你它包含CST-8(东八区),但是只从文件内容是无法知道它其实是Asia/Shanghai这个地理时区的。因为Asia/Chongqing这个时区(可能已经不在用了)也包含CST-8,因此只根据CST-8不能反推出Asia/Shanghai,虽然在实践中你确实可以这么做,大概率没问题,但面临国外时区时就懵了,因为我们很难去懂外国的时区关系,特别是那些一个国家包含多个时区的- 虽然说无法从 zoneinfo 解析出类似
Asia/Shanghai之类的地理时区名称,但它依旧可以用于正确解析出时间(因为时区名称只是一个名字,它指向一堆时区规则)。因此解析不出Asia/Shanghai之类的名称根本无所谓,只是看起来明确好看而已,我们能解出CST-8这个名称已经很大程度解决问题了
- 虽然说无法从 zoneinfo 解析出类似
- 上述提到的两种错误实践其实挺常见的,因此 Agent 对此也做了支持
- 在实践中,很多用户并没有让
- 如果上述手段都不能解出时区,默认使用 UTC 时区
注意,时区的解析只会发生在 Agent 第一次碰到该容器时,在Agent进程的生命周期内只会执行一次。因此通过 k8s 的 postStart 钩子去修改时区这种行为是无效的,因为此时容器已经启动成功了,这种行为也不会影响已经启动的进程对时区的认知。
错误做法:
某个容器直接把 /etc/localtime 链接到 zoneinfo 目录,这完全是不符合规范的。此时默认为 UTC 时区。
推荐时区配置方式
- 为容器声明环境变量
TZ,比如在 k8s 的 yaml 里就很合适,或者直接在 Dockerfile 里声明ENV TZ=Asia/Shanghai - 在 Dockerfile 里将
/etc/localtime软链接到/usr/share/zoneinfo/Asia/ShanghaiRUN ln -snf /usr/share/zoneinfo/Asia/Shanghai /etc/localtime
介绍
本文介绍基于 Helm 的方式部署 HoloInsight 以及 HoloInsight Agent。

你需要准备的:
部署 HoloInsight
注意,本例子中,数据库的部分也会被该Helm Chart一起部署,但它们是不可靠的,没有使用任何高可用方案以及持久化存储,这意味着一旦重新部署,你将丢失所有数据。 在生产级的实践中,需要你准备好这 4 种数据库(手动部署或者购买云厂商提供的服务),并且做到生产级高可用。
在 holoinsight-server 命名空间 升级或安装(更新) 最新版本的 HoloInsight:
# Add holoinsight repository
helm repo add holoinsight https://traas-stack.github.io/holoinsight-helm-charts/

kubectl create namespace holoinsight-server
helm -n holoinsight-server upgrade --install holoinsight holoinsight/holoinsight
如果你想安装特定版本:
helm -n holoinsight-server upgrade --install --version 1.0.0 holoinsight holoinsight/holoinsight
等待所有 Pods 处于 Ready 状态。你可以使用如下命令可视化地观察进度:
kubectl -n holoinsight-server get pods -w
例子输出:
$ kubectl -n holoinsight-server get pods -w

NAME                                      READY   STATUS    RESTARTS   AGE
holoinsight-mongo-0                       0/1     Running   0          9s
holoinsight-ceresdb-0                     0/1     Running   0          9s
holoinsight-es-0                          0/1     Running   0          9s
holoinsight-server-0                      0/1     Running   0          9s
holoinsight-collector-7ff4bd95b7-jfnj4    0/1     Running   0          9s
holoinsight-prometheus-69795584d6-w7njb   0/1     Running   0          9s
holoinsight-mysql-0                       1/1     Running   0          9s
holoinsight-mongo-0                       1/1     Running   0          13s
holoinsight-collector-7ff4bd95b7-jfnj4    1/1     Running   0          13s
holoinsight-ceresdb-0                     1/1     Running   0          13s
holoinsight-es-0                          1/1     Running   0          17s
holoinsight-prometheus-69795584d6-w7njb   1/1     Running   0          22s
holoinsight-server-0                      1/1     Running   0          47s
初始化 HoloInsight
首次部署时,需要对 HoloInsight 做一些初始化。非首次部署可以跳过该步骤。 当前产品层缺少初始化引导页面,故需要通过脚本方式进行始化,它做了如下事情:
- 添加一个租户叫做 "default",配置其存储使用 CeresDB
- 添加一个 apikey "default"
- 录入 JVM 插件
- 录入应用监控左侧菜单配置
git clone https://github.com/traas-stack/holoinsight-helm-charts
cd holoinsight-helm-charts

# 某些脚本的行为依赖特定的版本,如果你刚安装的 HoloInsight 不是最新版,
# 建议你使用 git checkout holoinsight-1.0.0 切换到对应的版本。
./scripts/holoinsight/init.sh
输出样例:
[database] wait for [holoinsight-mysql] to be ready
partitioned roll out complete: 1 new pods have been updated...

[database] wait for [holoinsight-server] to be ready
partitioned roll out complete: 1 new pods have been updated...

[database] populate init data
mysql: [Warning] Using a password on the command line interface can be insecure.
done
访问产品层页面
在生产级的实践中,你需要手动创建 Ingress 并且暴露为域名。
通常 Ingress 的配置依赖具体的部署环境,故没有在本 Helm Chart 里提供。
这里提供的页面访问方式仅能用于测试阶段。
将 HoloInsight 80 端口映射到本地 8080 端口:
cd holoinsight-helm-charts
./scripts/holoinsight/server-port-forward.sh
输出样例:
Visit HoloInsight at http://localhost:8080
Forwarding from 127.0.0.1:8080 -> 80
Forwarding from [::1]:8080 -> 80
Handling connection for 8080
访问 http://localhost:8080 即可。
此时页面上没有数据,你需要安装HoloInsight-Agent 和 示例应用以便产出一些数据.
定制 HoloInsight
比如修改镜像版本,且增大容器规格。具体支持哪些定制请参考 Chart 内容。 创建一个新文件 values.yaml
server:
  image: holoinsight/server:ANOTHER_TAG
  resources:
    requests:
      cpu: "4"
      memory: "8Gi"
    limits:
      cpu: "4"
      memory: "8Gi"
# applicationYaml: override application.yaml of Spring Boot
更多配置查看 server-bootstrap-configuration。
执行如下命令进行安装或升级(更新):
helm -n holoinsight-server upgrade --install holoinsight -f values.yaml
查看部署情况
helm -n holoinsight-server list
卸载 HoloInsight
helm -n holoinsight-server uninstall holoinsight
部署 HoloInsight Agent
编辑 values.yaml
apikey: "default"
common_version: '1'
workspace: "default"
cluster: "default"

server:
  registry:
    addr: registry.holoinsight-server:7202
  gateway:
    addr: gateway.holoinsight-server:19610
  secure: false

# 如果你使用的是 containerd 或 k3s+containerd,你应该将 containerd 的 run 目录挂载到 cadvisor.
# 如下是 k3s+containerd 场景的配置:
#cadvisor:
#  volumes:
#  - name: containerd
#    hostPath:
#      path: /run/k3s/containerd
#  volumeMounts:
#  - name: containerd
#    mountPath: /run/containerd
#    readOnly: true
更多配置查看 agent-bootstrap-configuration。
在 holoinsight-agent 命名空间里安装或升级(更新) HoloInsight-Agent:
kubectl create namespace holoinsight-agent
helm -n holoinsight-agent upgrade --install holoinsight-agent holoinsight/holoinsight-agent -f values.yaml
卸载 HoloInsight-Agent
```bash
helm -n holoinsight-agent uninstall holoinsight-agent
更多安装方法
helm -n holoinsight-server upgrade --install holoinsight https://github.com/traas-stack/holoinsight-helm-charts/releases/download/holoinsight-0.2.3/holoinsight-0.2.3.tgz

# 如果你无法访问公网,你可以通过其他方式下载到本地然后使用:
helm -n holoinsight-server upgrade --install holoinsight holoinsight-1.0.0.tgz

# 如果你想要修改 Chart 本身,想要在不发布 Chart 的情况下进行部署:
helm -n holoinsight-server upgrade --install holoinsight PATH_TO_YOUR_holoinsight_chart_dir
安装示例应用
在探索 HoloInsight 之前,推荐安装 2 个实例应用到 K8s 集群里。让它们产生一些调用流量,提升 HoloInsight 上的展示效果。
cd holoinsight-helm-charts
# 安装实例引用
./scripts/holoinsight/demo-up.sh

# 卸载实例引用
./scripts/holoinsight/demo-down.sh
初次探索 HoloInsight
打开机器列表页面,展示了所有 Pods 的信息。
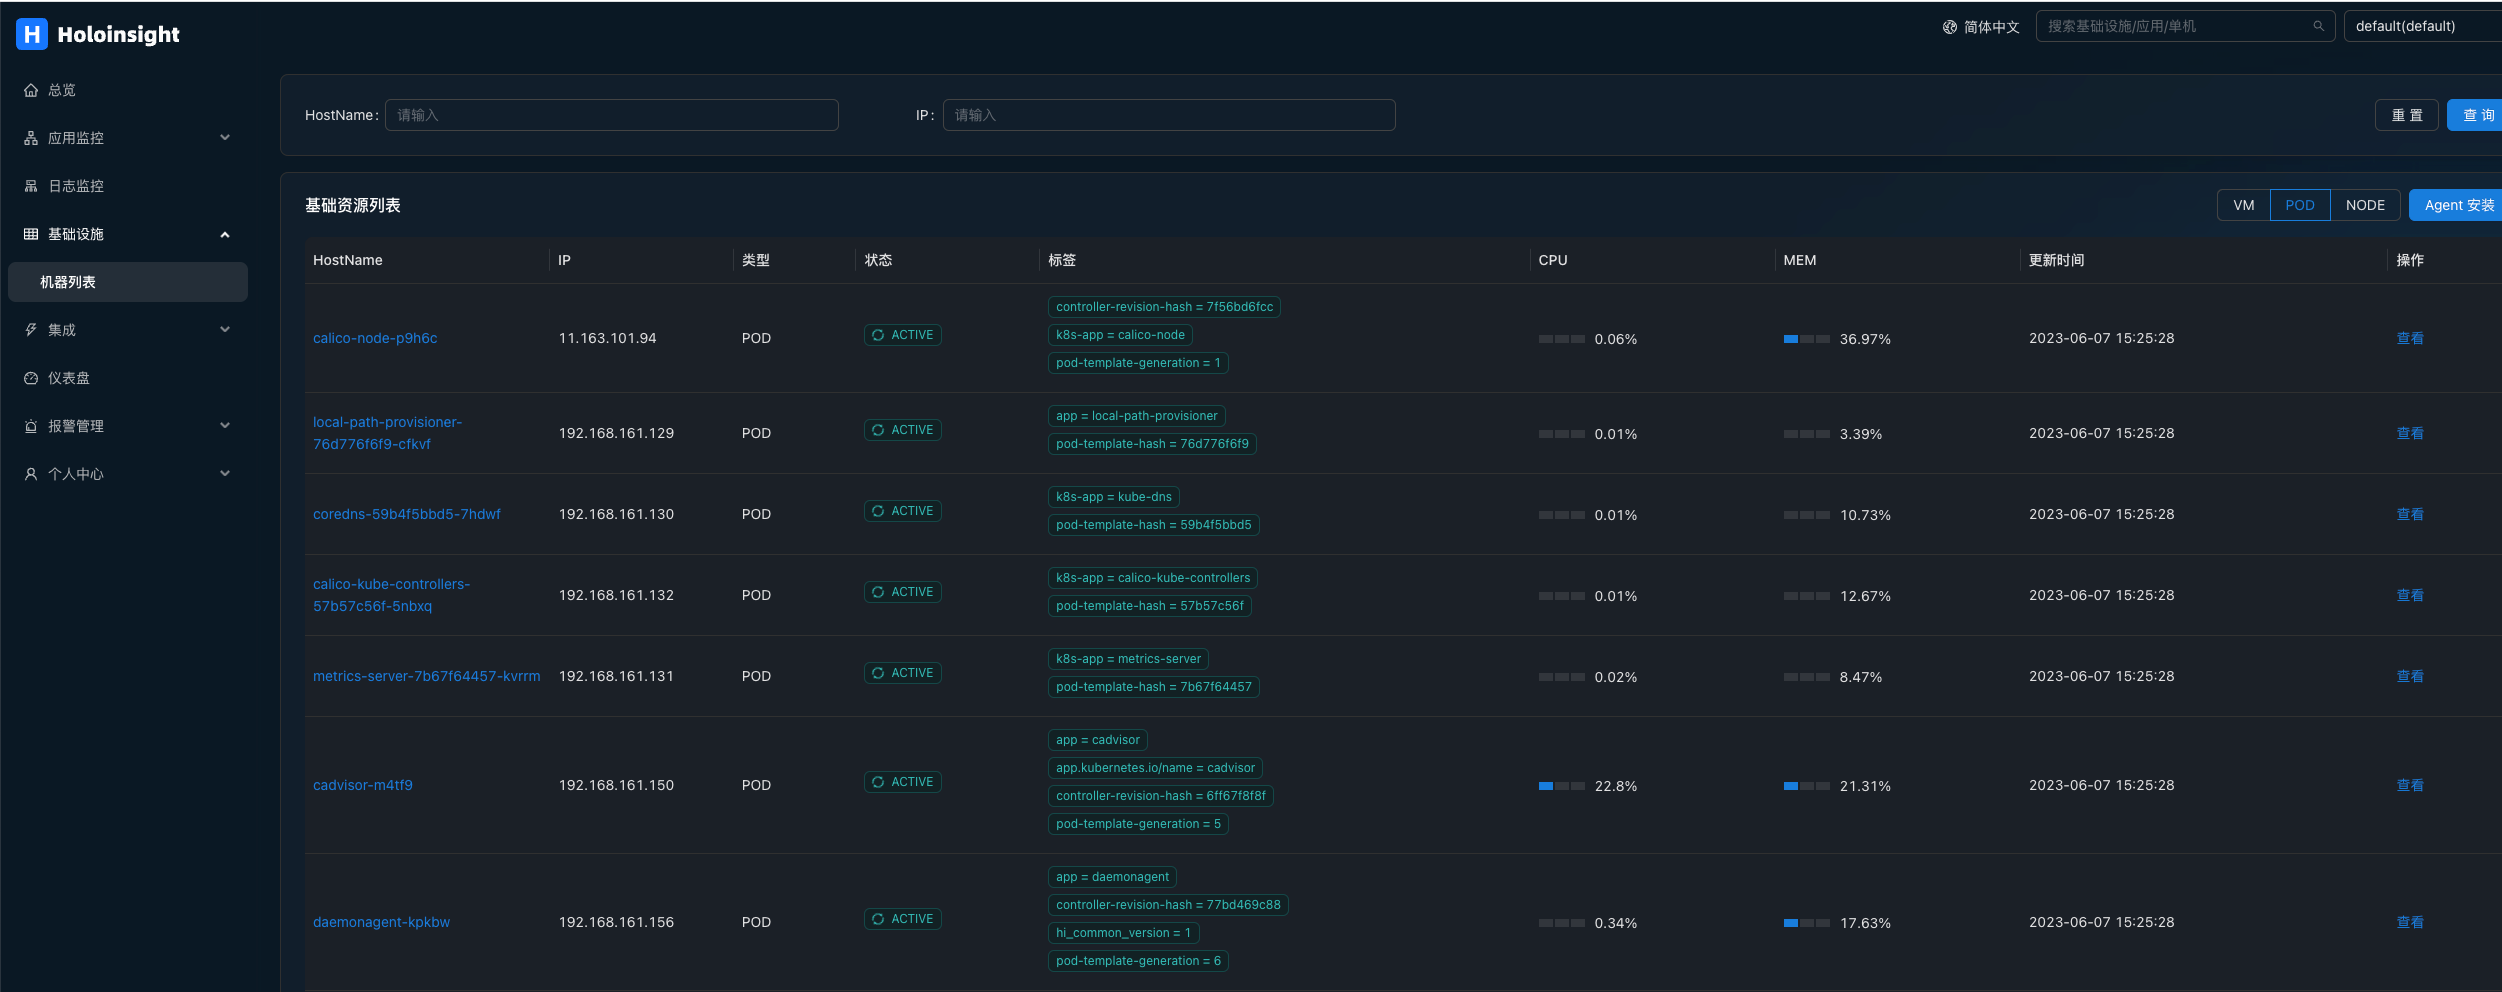
如果 CPU 和 MEM 列是空的,可能是才刚安装完不就,没有数据,此时需要等待 1~2 分钟。
点击旁边的查看按钮,服务端会利用 Server 与 Agent 之间的长连接发起一个反向请求查询该 Pod 的一些基本信息。
如果该页面可以正常显示,说明 Server 与该 Pod 的 Agent 之间的通信链路是正常的。

之后介绍的 "浏览目录", "浏览日志" 功能也是通过该反向连接实现的。
打开应用监控。
服务端会从所有 Pods 里提取出 App 元信息(这是由一个定时任务驱动的,如果没有看到数据,请再等待 1~2 分钟)。
默认情况下 Pod 的 app 或 app.kubernetes.io/name 标签会被识别为应用名。
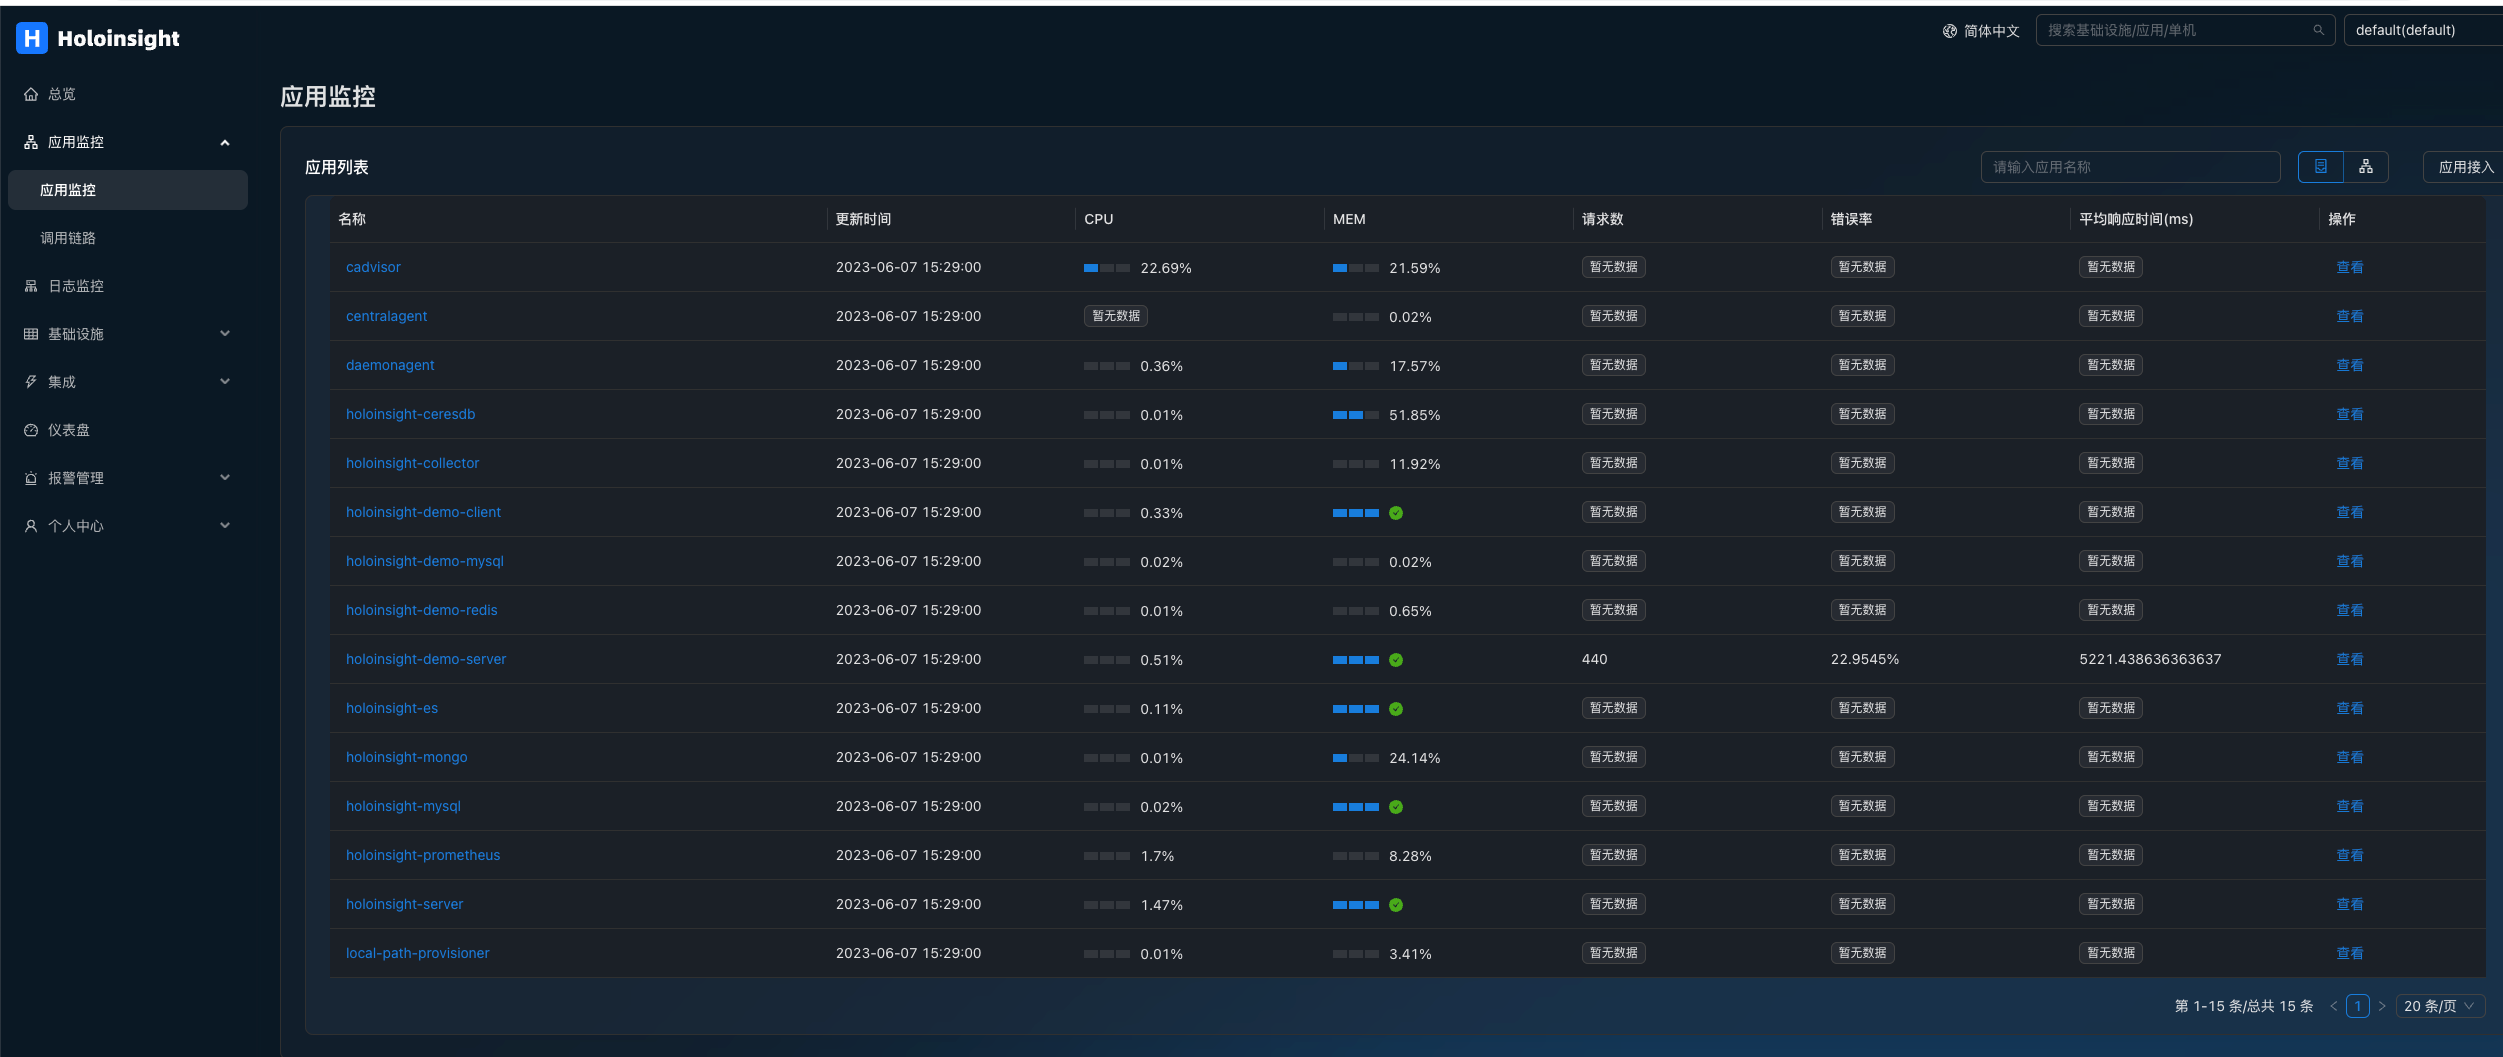
如果应用接入了 SkyWalking agent 并且上报到 holoinsight-collector,此时页面会显示"平均数" "错误率" "平均响应时间"这3个字段的值,如 holoinsight-demo-server。
查看 Pod 系统指标:

查看应用的 JVM 指标:
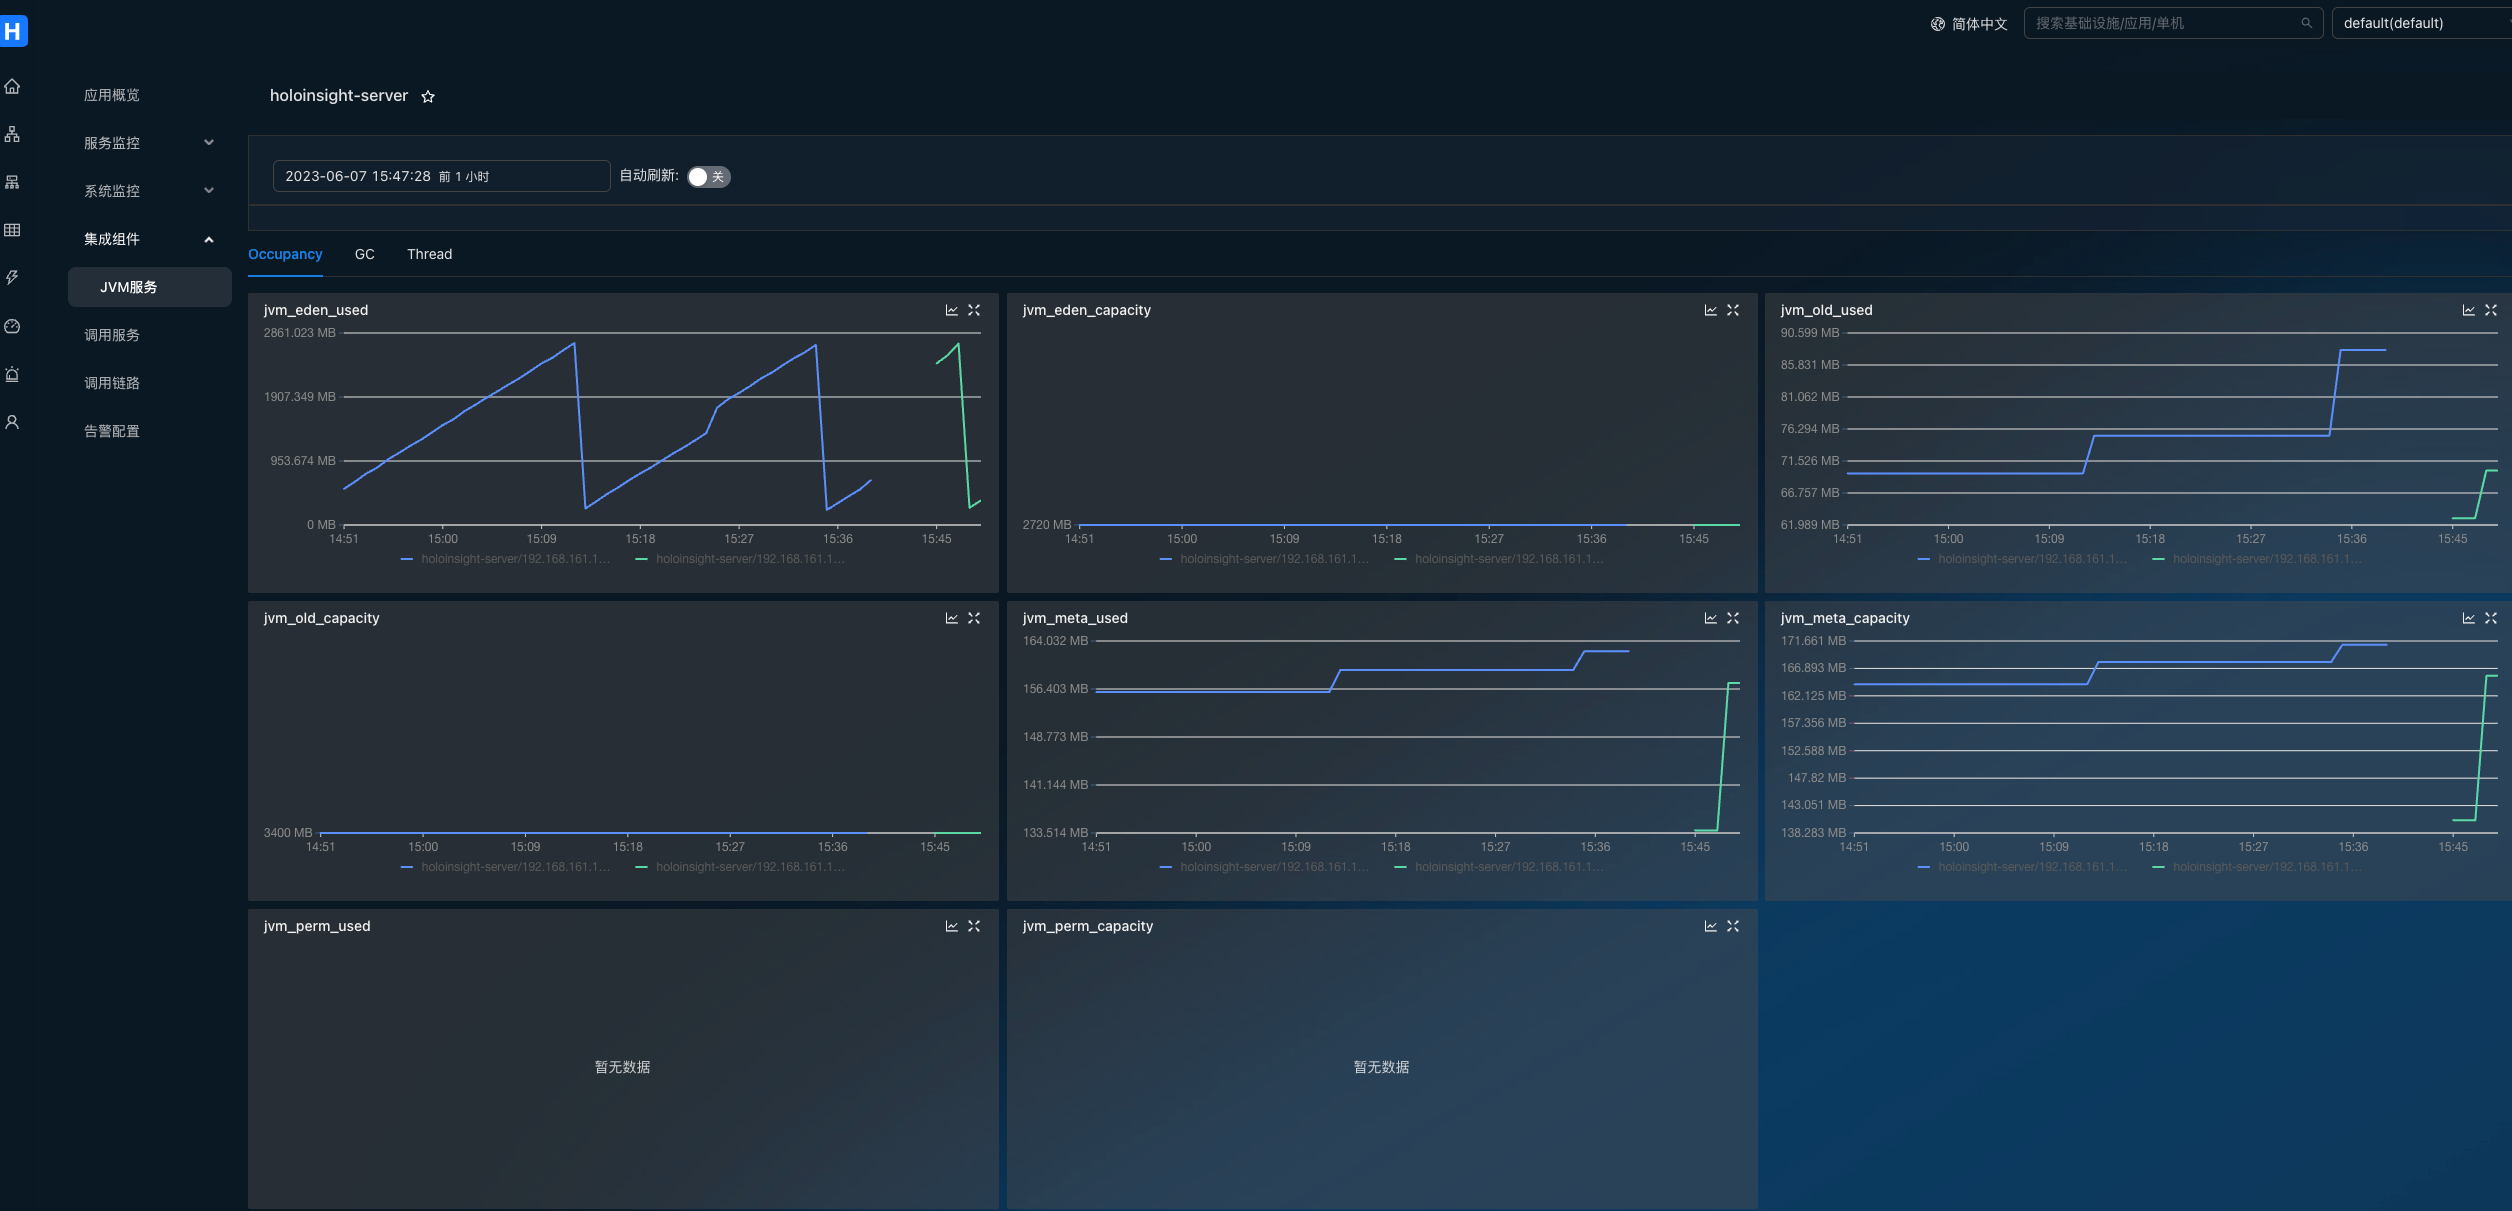
搜索链路:

查看链路详情:
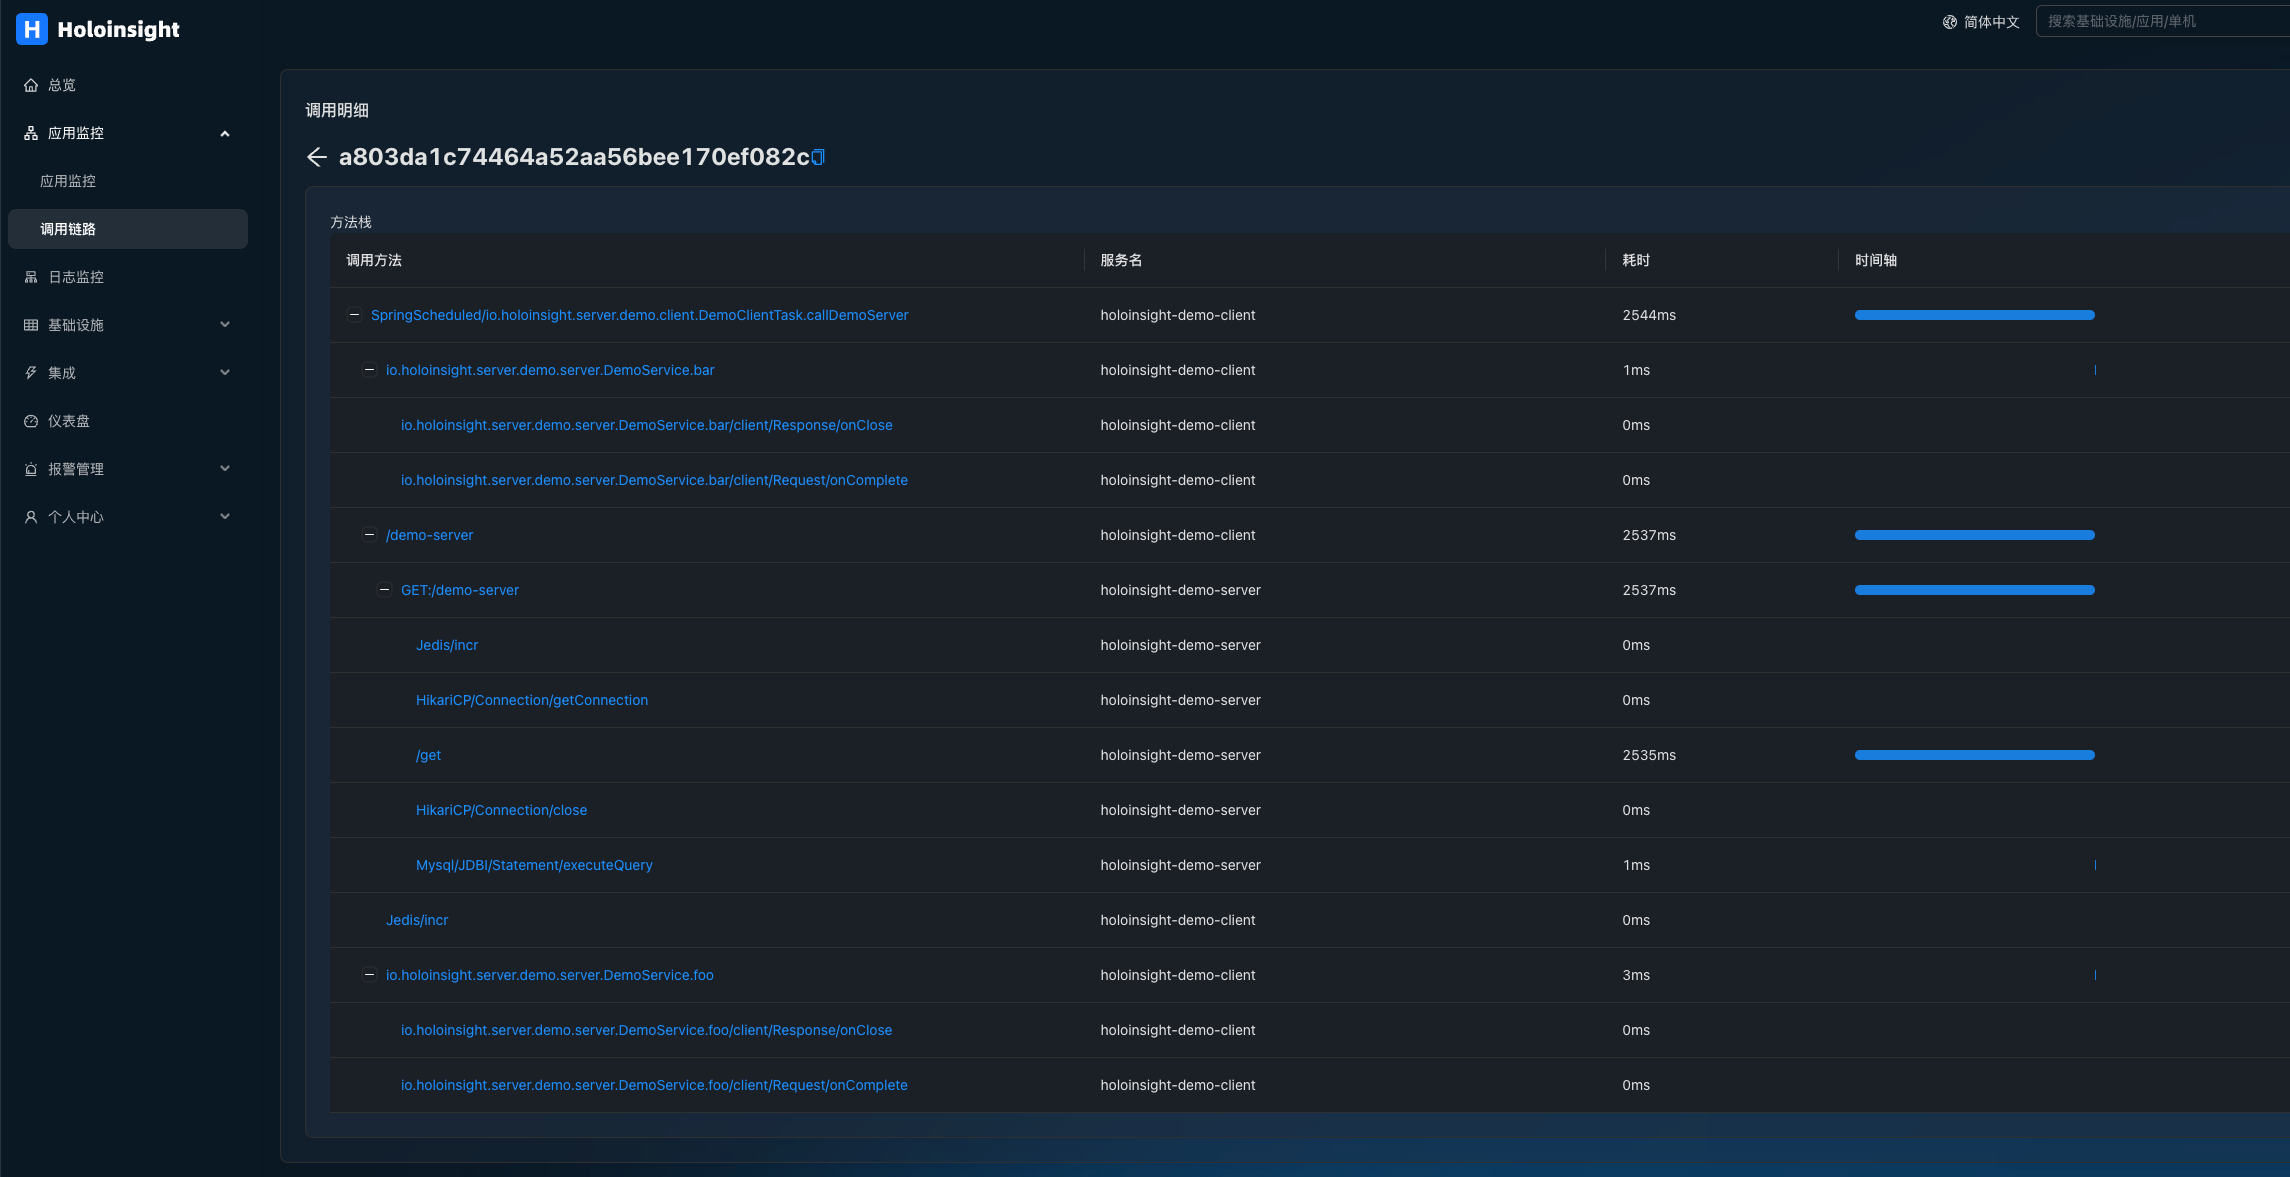
查看基于链路的服务指标:
